Kitchen Update – Happiness in a Paint Can
It’s Wednesday, which means it’s time for another round of Dueling DIY – Kitchen Renovation. I’m playing along with Sarah at The Ugly Duckling House and Carrie from Brick City Love. Be sure to check out all their progress. Word has it that Sarah’s home is now wallpaper-free and Carrie has acquired actual soapstone. I’m so jealous. My original dream for this kitchen was soapstone counters. She’s a lucky girl.
I wasn’t sure how much I would get done this week. Hubs came home late Thursday night. He’d been gone since early January and he was only home for a few days. I wasn’t sure if we’d have time for and/or interest in kitchen work or not.
I managed to sneak in a little painting here and there. I needed to feel like I was making progress. Aahhhh…so much better.
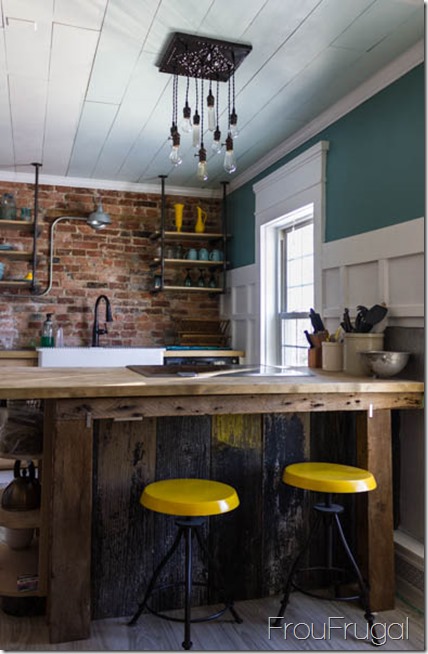
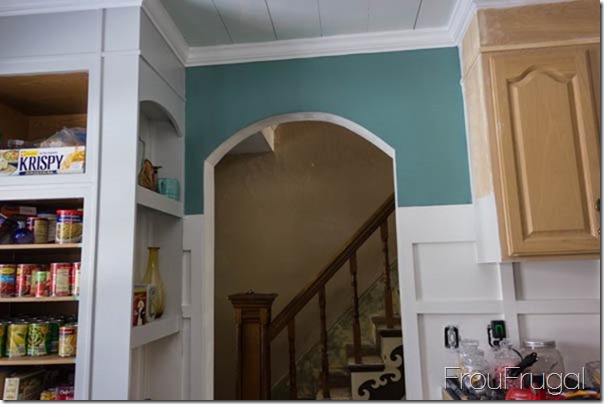
Who knew happiness was found in a paint can? I love this color. It’s Valspar’s Patina Blue, if you are interested. It’s the closest match to my vintage Mason jars that I could find. The ceiling is a lightened version of Valspar’s Glass Tile, which is also a good match for the Mason jars.
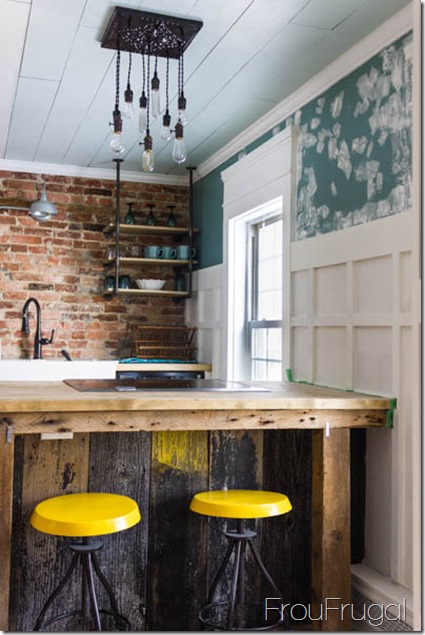
Round 958 with the plaster seems to have done the trick in evening out all the wonky spots. Getting plaster walls smooth is no joke. I may not have done quite 958 rounds of plaster, but it sure felt like I did. I don’t even want to think about the remaining section of wall I have to smooth out. My shoulder is still angry with me.
I still need to paint the board and batten area between the windows. That area just has primer on it right now. That’s on my agenda for this week.
It occurred to me on Saturday that I should ask Hubs to finish my builds for me in the kitchen. I was dragging my feet about working on them. Not because they are hard to do, but precision stuff takes more brain capacity than I’ve been operating on lately. Hubs is very good at precision stuff.
He finished up our garbage pull-out for me. He thinks I’m a genius for coming up with this design. I didn’t argue with him. If he wants to think I’m a genius, it’s okay by me.
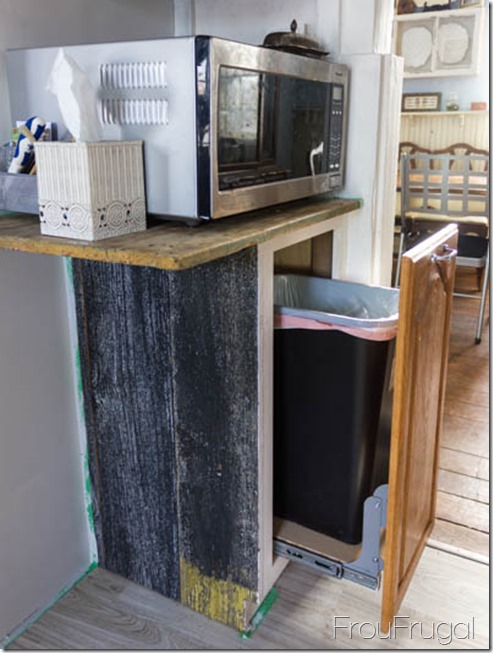
We had to custom make this pull out which meant modifying the hardware. I’m so glad he did this for me. There were some iffy moments when we didn’t think we could make it work, but Hubs is a smart guy and he made it work. I’m a happy girl the garbage is now out of sight and, more importantly, away from the dog.
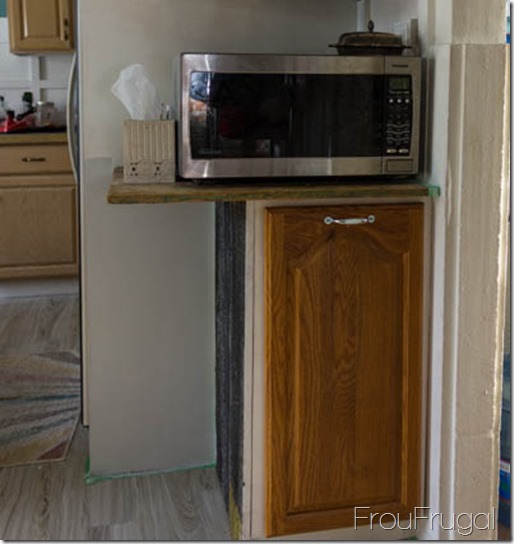
You can see that I started painting the light gray on the fridge surround under the counter. I have to do this before I can finish up this little unit. Also, there is a slight crack in the cupboard door that I need to fill before I prime and paint it the dark gray.
Yesterday, I picked up a utility handle at the hardware store because it’s hard to open the garbage drawer without one. I still hadn’t decided what to do for door pulls/knobs, I just knew I didn’t want these ones.
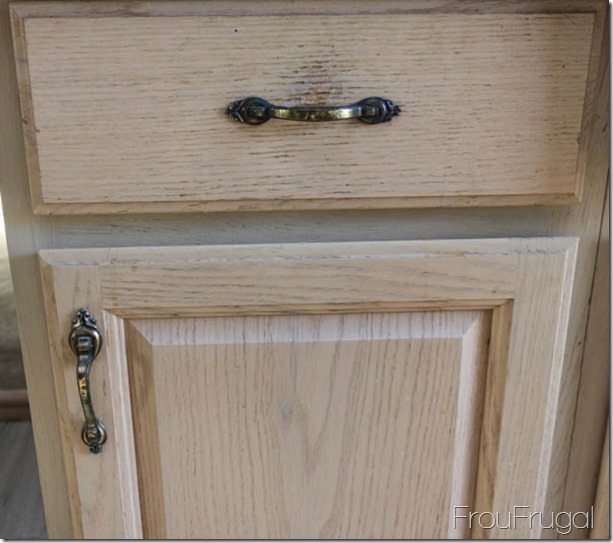
I don’t mind the brass, but the look of them is all wrong for this kitchen. They are too ornate and too circa 1980. After I dropped Hubs and Katie off at the airport yesterday, I took a swing out to Columbus Architectural Salvage to see if they had any vintage handles that would work.
They had some old, engraved cup pulls with the most gorgeous patina that I would LOVE to have, but not at $20/each. Yeouch! I finally decided simple is best. This kitchen does not need schmancy handles. I ordered some simple utility pulls online from D. Lawless Hardware for $1.20/each. I need 27 of them for my kitchen.

I originally planned to do cup pulls and glass knobs. If I wasn’t going to be selling the house, I’d have probably gone ahead with that option. Now, I just want something inexpensive that compliments the look of the kitchen. I think this simple utility handle has a nice vintage feel, and the satin nickel finish will play nicely with the other galvanized steel elements in the kitchen.
I also had Hubs work on my heater surround. He didn’t have time to finish it, but he got the parts I was not wanting to do completed, so I can finish this area up myself.
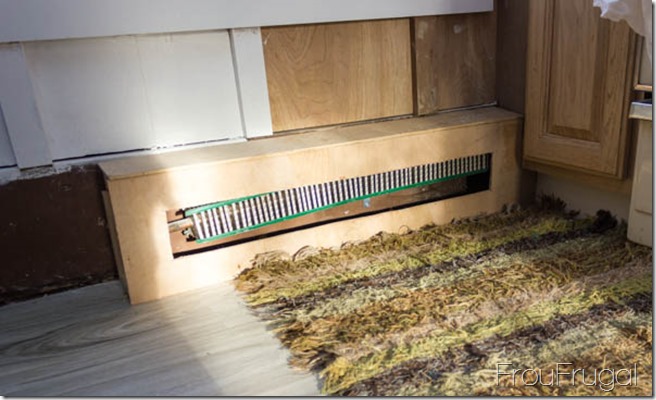
I love that guy. He was not happy to leave us here with so much still to do. He really loves how the kitchen is coming together. It makes it harder to leave a home when you create something you love. I’m just hoping someone else will love it enough to want to buy our home. I’m very nervous about the prospect of paying for two homes. Been there, done that and still have the scars, thankyouverymuch.
Don’t you just love the morning sunlight streaming across my Amish rug onto my lovely, unfinished wall? After all the gloomy weather we’ve had this winter, I will gladly take sunshine where ever I can find it.
That’s where I am this week. However, I’ve forgotten to show my To Do list for the last couple of weeks. I’m mostly done with the old list, so here’s my list of final steps to finishing the kitchen.
-
Finish building radiator cover, prime and paint
-
Finish building microwave area, prime and paint
-
Paint ceiling
-
Finish caulking cupboards and crown molding
-
Skim coat unfinished wall area
-
Prime and paint unfinished wall area
-
Fill holes using Bondo on microwave stand, cupboard doors (old hardware holes)
-
Prime cupboards
-
Paint cupboards
-
Attach new hardware to cupboards
-
Reattach trim to peninsula
-
Paint shelves and rehang
-
Secure open shelves with brackets
-
Build open shelf unit
That’s all I have left. I know that probably seems like a big list, but considering how much I’ve already done, it’s nice to get all the remaining steps down on one list. I’m meeting with a contractor this week about doing some work in our bathroom for us. We have to make some changes/repairs before we can list the house and if I had the time, I’d do it myself. I’m out of time and I need help to get this done. Of course, if the price is too much, I may just be working on it myself.
One final change, I fixed the wall in this area, too. So, happy now! I also started painting the gray on the pantry area. I had to buy the paint in quarts and I realized 2 quarts was not going to be enough paint to do all the cupboards. Since I have to buy more paint, I think I will go ahead and get the semi-gloss sheen. I think this shade of gray needs a higher paint sheen to keep it from looking like car primer. I will use up what I have on the first coat of paint and then finish up with the higher sheen.
Has anyone else found happiness in a paint can, or is that just me?
