Take a look-see:
I love this pumpkin! I know, I say that about everything. I can’t help it. I may have a disease of some kind. As it turns out, I’m completely okay with loving cute, coppery metal pumpkins.
Want to make one for your very own? Here’s what you’ll need:
- Bent-nose pliers
- Crescent Wrench
- Scissors
- 1 – 1/4″ x 4″ Threaded bolt
- 2 – 1/4″ Nuts
- 1 – 1/4″ Wing Nut
- 2 – Washers
- Copper Spray Paint
- 1 10′ Roll – Copper Hanger Tape (That’s what it says on the package, but Hubs called it “Pipe Strapping” and when I asked the Home Depot guy for it, he knew what I was talking about)
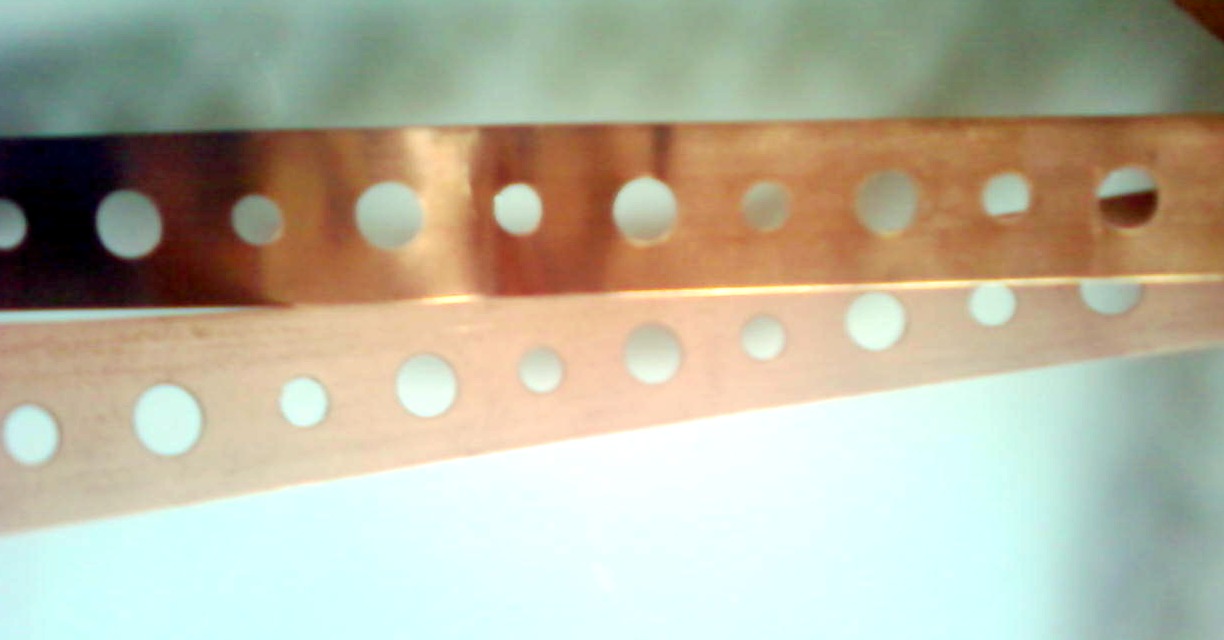
Here’s what it looks like:

A word of advice…look for the “American Valve” brand and not the Oatey Brand. The Oatey (bottom piece in the above picture) is hard to cut and the surface is kind of dull and scratchy looking. The American Valve brand (top piece) is shinier, has a deeper copper color, and easier to work with. I could have sworn I bought them both at Home Depot. However, HD likes to rearrange their store and
every time I go in there things are in a completely different place, so now I’m not so sure. I ended up using 5 pieces of each brand, so my pumpkin has some texture to it.
Edited: I noticed that this project was linked on Childmade.com (which thrills me) but I want to mention that this pipe strapping is sharp on the edges. I actually cut myself while making this pumpkin, but if you follow my blog, you may realize by now that I’m kind of klutz and there’s a reason Hubs gets nervous when I have a knife and/or glue in my hands. If you want to make this project with children (which would be great for cub scouts) I’d cut the straps for them and have them be very careful when handling it. They’d also need help tightening the nuts down.

Not a great picture. Sorry about that. Dear Santa Hubs, All I want for Christmas is a new camera that is not also a phone. I’ve been a really good girl this year… I spray painted the nuts and bolts and washers with the copper spray paint and let them dry. You could mix the galvanized and copper metals for a different look, if you want to skip this step.
I cut the pipe strapping about a foot long. However I went from big hole to big hole, so it’s a little less than a full inches.
I cut the strapping with an old pair of scissors I have for such projects. I just cut as close to the small hole as I could and still have a straight edge. I also wanted to keep the pieces as close to the same size as possible.
Next, layer the straps on the bolt. If you find both types of strapping and are mixing the finishes, be sure to thread them on in an alternating manner. As you unroll the pipe strapping, it keeps the curve from being in a roll. The American Valve brand bends very easily, so it’s easy to straighten back out. If you’re using the Oatey brand, make sure as you thread your pieces on the bolt that all the straps are curling up towards the top of the bolt, since that’s the way you want your pumpkin to curve.
See how they curve upward?
After they are on the bolt, drop on a washer and nut and cinch it down, but don’t tighten it all the way yet.
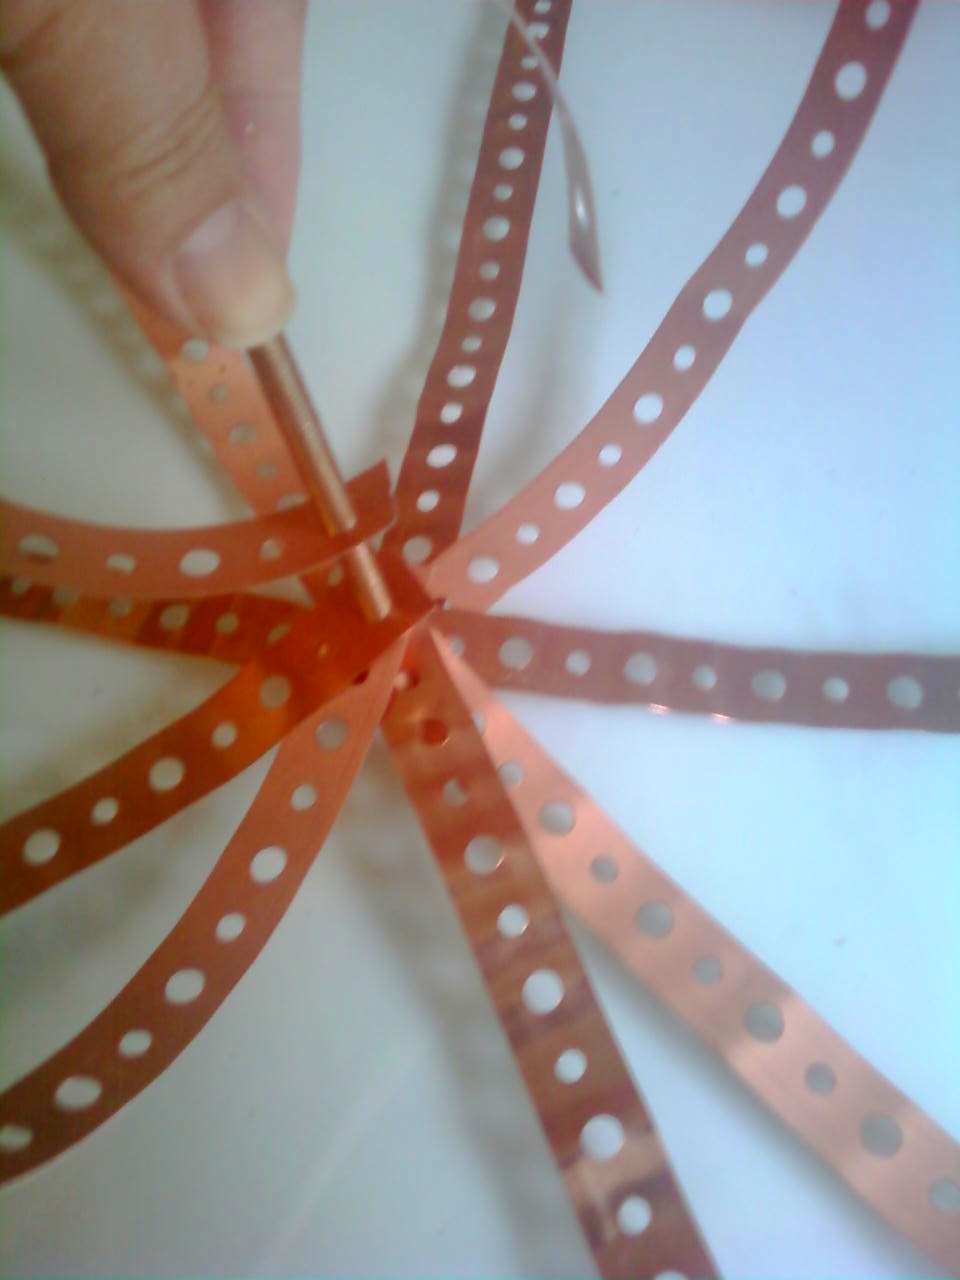
Before you tighten the nut down, you want to get your straps evenly arranged around the bolt. Start with the bottom strap. I’ve numbered them in this picture below so you can see which straps should be opposite of each other.
Once you have them where you want, tighten the nut down as far as you can. Use a crescent wrench to get it down as tight as possible. In order to get your wrench in to tighten the nut, you may need to hold down the straps like so:
Next, thread the other nut onto the washer about 1.25″ – 1.5″ down from the top of the bolt. This makes a stopping point for your straps. Thread the straps onto the bolt, starting with the first strap. Trust me on this point. It’s easier to get the straps to bend the way you want if you do this step.
After you have all the straps on, drop the other washer on there and then thread the wing nut onto the bolt and cinch it down. Go ahead and tighten it all the way down at this point. You want the straps held in place so you can bend them.
Using the needle nose pliers (especially if you’re using the Oatey Strapping) bend the straps at the first big hole away from the bolt. Confused? Take a look:
Do this at the top and the bottom. This makes the pumpkin more round and keeps it from tipping. Loosen the wing nut and wrap some wire around the bolt or any other embellishment you want to add for leaves and such. Tighten the wing nut back down to hold them in place.
Display your pretty new pumpkin in a festive manner…this baby wants to be shown off!
Kathy, from
Sylvia’s Vintage Daughter, gave me this adorable clock face and spring when we met in real life this week. I’ve been wanting a spring for some time now, so I’m thrilled she gave me one.
Cost Breakdown:
Bolt – $.60
Nuts – $.82
Washers – Stash on hand
Copper Hanger Tape – $3.83
Spray tape, wire, beads – Stash on hand
Total Project Cost – $5.25
Total Project Time – 30 minutes (not counting drying time for spray paint)
Now hold onto your glue guns, Gals, because this beauty is up for grabs. As a thank you to my 127 (last count) followers, I am going to show my appreciate to you! I’m so thrilled that there are people out there who enjoy the projects I’m working on and want to follow me on this journey.
Here’s how to enter (pick one, or do all for even more chances to win).
- Leave me a comment to let me know you’re a follower.
2. Follow the FrouFru Gal on Facebook and Twitter and leave me a comment for each one. There’s helpful links over on my sidebar.
3. Help spread the word about The Frou-FruGal via Facebook, Twitter, Tumblr, Stumble, whatever social media you prefer and leave me a comment.
4. Blantant, Flagrant and obvious kissing up comments are encouraged and thoroughly enjoyed. If you leave me one of those and you win…a little extra sumin’ sumin’ will be headed your way.
Whether you enter or not, please just know how grateful I am for you and the encouragement you give to me.
I’ll pick the winner on Sunday, October 31st.

Be sure to check out my side bar to see where I am linking up!
My Give Away is listed at: