Kitchen Update – Challenge Accepted

As you may know, I’m working on finishing my kitchen. I like to read the blog, The Ugly Duckling House, and Sarah, the writer of the blog is also in the middle of kitchen reno. Sarah is in a Dueling DIY battle – Clash of the Kitchens with Carrie from Brick City Love. Poor Carrie has been working on her kitchen since June of 2012 and hasn’t had running water for much of that time. At least I’m not as bad as her.
I mean, I started my kitchen renovation in August of 2012, thankyouverymuch. A full TWO MONTHS after Carrie. I’ve also had running water for nearly all of that time, except for the week it took us to put in our new sink and it was also hit and miss for the week when my water pump was acting up, but mostly I’ve had running water. Still, Carrie has a brick wall in her kitchen, too, so she and I must be living duplicate lives or something!
When I read about their challenge with each other to post weekly progress on their kitchen and invited others to join along, I was all over that. I will see your To Do list, Ladies and raise you a project or two.
The competitive spirit in me is alive and well because all week long I was pushing through on projects, most of which are just the unfun prep work kind of things. However, I did have one beauty project. Look what I made this week!
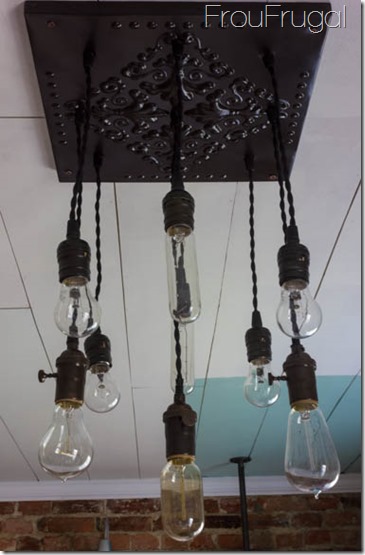
Out of all the things I’ve ever made in the history of ever, this has to be my favorite to date. In fact, I’m seriously going to have a hard time leaving this in the house when we move.
Here’s how the bulbs look all lit up.

Oh. My. Gosh! I’m just in love. The three main bulbs in the chandelier glow very yellow and I know that’s not something everyone would like, but I absolutely adore it. More importantly, my boys and husband like it.
Since I have the two large windows in the kitchen, the natural light really offsets the yellow glow during the daytime. In the evenings, it’s just a nice warm glow and the yellow doesn’t impact the colors in the kitchen so I’m happy, happy, happy!
The light started out as a $4.99 decorative tile that I picked up from a Thrift Store. Someone had tried to spray paint it gold, but it was a really ugly gold. I forgot to take a picture of the ugly gold (bad blogger), but apparently this tile actually started it’s life out with a copper finish. She’s just going to go through all the metal looks. Oil-rubbed bronze suits her very nicely.
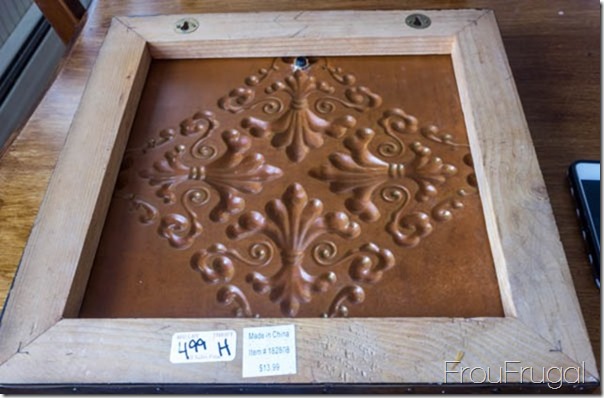
I didn’t realize it was originally copper until I was building the light. I would have loved to do a copper/verdigris finish on this fixture, but since I plan on painting my ceiling a verdigris color, I think the oil-rubbed bronze is a nice contrast for the light.
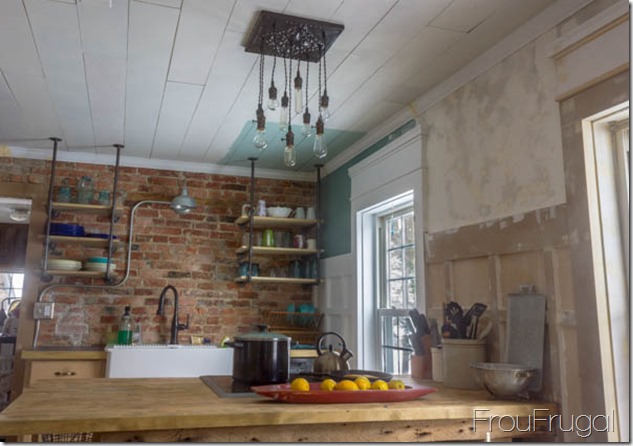
Obviously, I still have work to do in this kitchen, but having a new light and not having to squint or use the flashlight app on my cell phone to see in my kitchen after 4 p.m. makes a big difference for me.
Last week I also managed to get the smaller set of shelves on the left stained. They are now closer in color to the butcher block counter top and the trim around the porcelain tile counters. They are not staged, but they are useful, and right now, useful is wonderful!
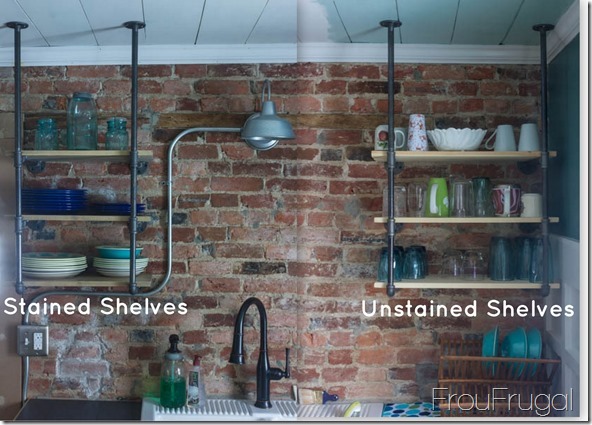
Ignore the picture collage. It was easier than trying to get a full picture of the shelves. I tried to use the same stain technique on these shelves that I did for the butcher block, but these shelves were very hard to stain. It’s almost like they repelled the stain, even after they were sanded and conditioned.
I ended up using the new Weathered Oak stain color from Minwax. It’s a very gray wash and it took me three coats to get the final color I wanted. I don’t think this is normal, though, so if you are using this stain for yourself, be sure to test a scrap piece.
Finally, I’ve been working on filling the big hole on the window wall.
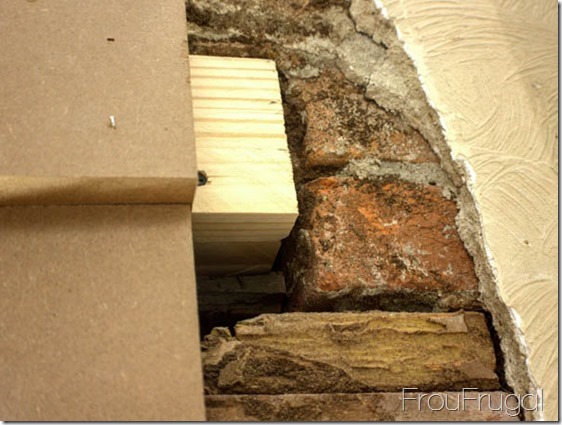
This is an older picture after we had fixed the header above the window that had termite and water damage. This whole side of the window was rotted out and when we pulled it off, a lot of the damaged plaster came with it. That hole below the new header goes back quite a ways. One of the reasons I left this hole here for so long was that I was unsure how to fix it.
This section is actually too thin to put drywall in and too thick to add plaster. While the new header is a good place to anchor a new piece of drywall, it’d end up being thicker than the rest of the wall. When I’d washed down the wall after this picture was taken, I washed away all that texture you see on the right side of the hole. I loved the smooth look of the plaster, so I didn’t want tape lines to ruin that look, which would happen with a new piece of drywall.
Finally, one day a solution came to me. I had a can of Great Stuff spray foam insulation. I’ve used this before on other projects and it really is great stuff. I figured I could spray it in the hole to fill the majority of this space and then cover it up with plaster to fill the rest of the space.
That’s just what I did.
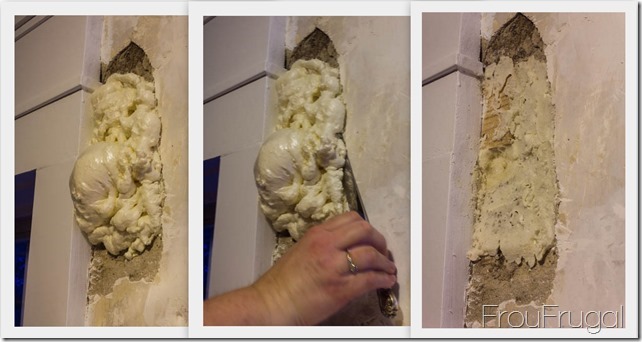
Even though the instructions tell you to fill the space only 50% full, I wanted there to be a good amount in this space so when I cut it back, the majority of the area would be filled with the foam. The only way I knew to do that was to overfill it and then cut it back. I used a serrated cake knife I had and it did a nice job of cutting the foam.
After I had cut back the foam, I just started filling in with plaster. Unfortunately for me, there were a couple of bubbles in the foam that still left some deeper holes to fill.
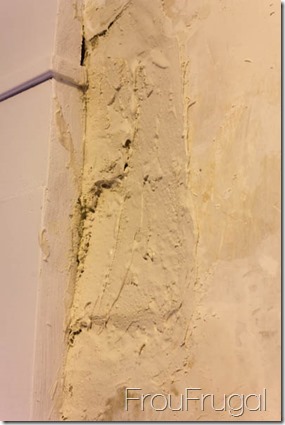
You can see how uneven things started out. This is one of those projects where it would be tempting to throw on a lot of plaster to fill in the space all at once. Don’t do it. You need to layer this a little at a time. Since it’s fairly cold outside and inside my house, I put on a fresh layer of plaster every morning and give it a full 24 hours to dry before putting on the next layer. I have done this nearly every day for the last week.
Here’s where I’m at now.
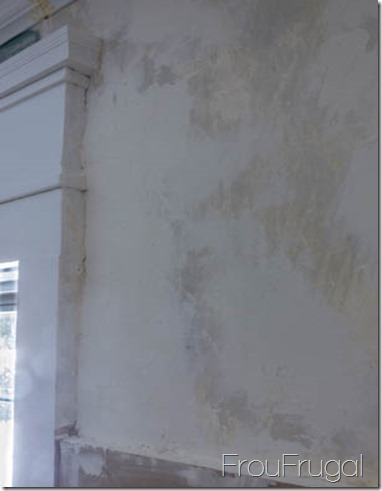
It’s hard to see white on white but if you look along the edge of the window casing, you can see that I still have some depressions to fill, but I am about 2 days away from sanding, priming and painting. It’s exciting.
I have also skim coated the arched doorway section by the bookcase.
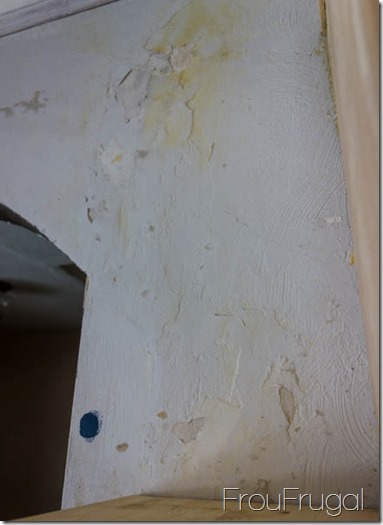
It took about 4 coats to get this section of the wall smooth. You can see just how rough it is. Plus, the archway was a later addition to the house and whoever added it didn’t do a very good job. The wall around the top of the arch is not as thick as the wall around it so it angled in quite a bit. I think I’ve fixed that, too. I’d show you a picture but it just looks smooth and white right now.
I need to sand it, which is on my agenda tomorrow when my people aren’t around. I find that projects that make a big mess and disrupt my kitchen function the most are best saved for times when all my people are out of the house. That way I can work without interruption and try to have the mess contained before they return. It takes me longer to do things this way, but it’s much easier on the family.
Here’s what’s on my agenda for the rest of the week.
-
Finish filling big hole
-
Sand window wall, prime and paint
-
Sand board and batten on window wall, prime and paint
-
Build radiator cover
-
Sand arched wall, prime, paint
-
Sand, stain and seal big shelves
-
Cut trim for window wall and chimney side
-
Caulk, sand and paint crown molding
Game on, Carrie and Sarah! Boo yah! Woot Woo and all that. I will be back later in the week to show you how I made my light fixture.
