Master Bedroom Makeover – Hand-stamped bench slipcover
My first attempt at making a slipcover is finally complete and I have to say that I’m pleasantly surprised. I think it turned out rather well. What do you think?
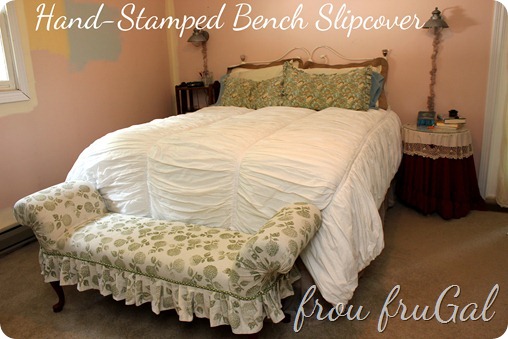
If you didn’t see how I stamped the fabric for the slipcover, I’ll sum up as follows:
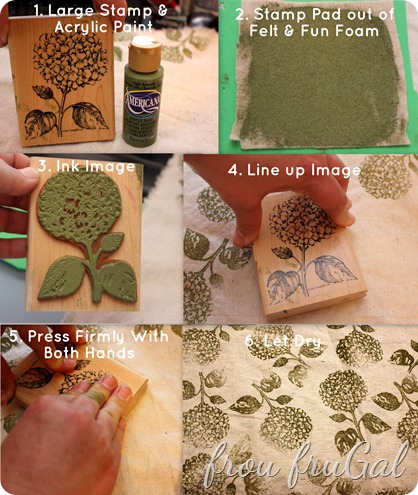
Once I had the fabric finished, I watched Miss Mustard Seed’s slipcover videos to get her tips and ideas. I’m a pretty good sewer and already had a good idea of how to make the slipcover, but I wanted to hear what she had to say since she’s made so many of them.
Because this is a unique shaped bench, I won’t give you step-by-step instructions, but will show you some tips that I think are universal to any slipcover you make.
1. Make Slipcover Inside Out
When you are pinning and cutting the fabric to size, make sure the wrong side of the fabric is showing. This allows you to pin the fabric in place and then sew where the pins are located. You are making the slipcover inside out, so keep that in mind if you are lining up patterns and such.
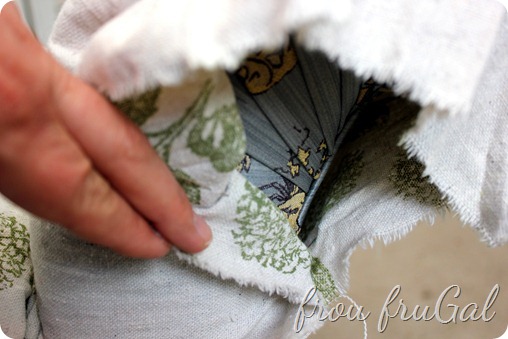
I pinned the fabric up to where the pleats were located on the bench. I then gathered the fabric for the curves instead of pleating it. It was too complicated to figure out backwards pleats. I like the gathered look for the arm as it echoes the gathers in my bedding.
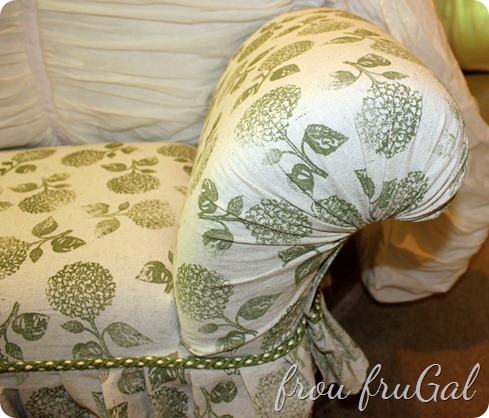
2. Pin, Remove, Adjust, Sew
When forming areas like this curved arm, it’s important to trying to pin things in place as much as possible while the fabric is on the bench.
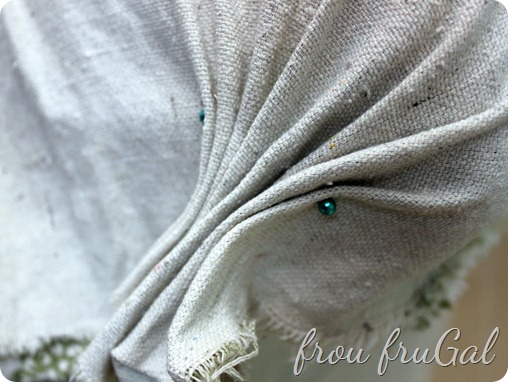
Use as many pins as needed to hold gathers and seams in place.
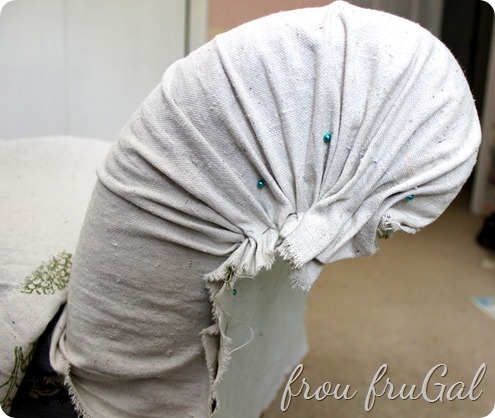
Be careful to not pin the fabric to the piece of furniture you are covering. You want to be able to remove the pinned section so that everything still stays together as much as possible.
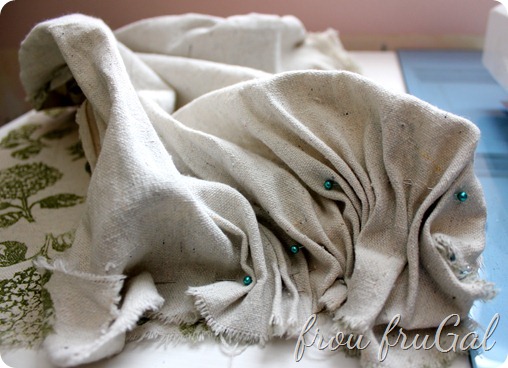
After you remove the piece, try to see how it comes together off of the furniture.See how the top right edge wings out when it’s flat? The surprised me a bit, but once I understood that was how it needed to lay in order to fit right, it helped me make sure all the gathered edges did that.

You will need to readjust the gathers. I knew the gathers needed to be evenly spaced between the top of the fabric and that horizontal pin just under the gathered area. Once you have readjusted the gathers, sew everything in place. I use a long stitch length my first time so if I need to make any changes, I can easily pick out the stitches.
3. Finish Your Seams
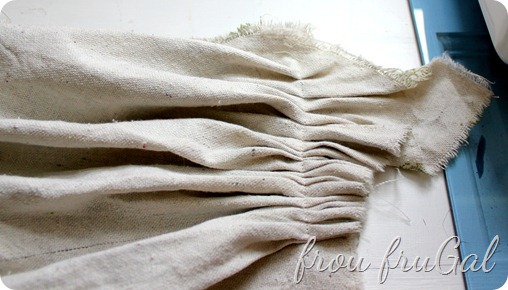
It may seem kind of obvious, but take the time to finish the seams, especially if you are working with a loose-weave fabric like this drop cloth.
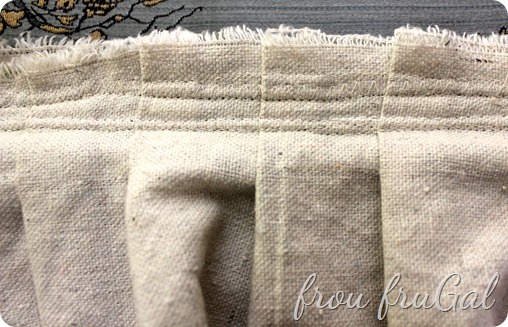
You can see how big of a seam allowance I left. Since slipcovers are made to be removed and laundered, you want the seams to withstand the cleaning process. I have yet to wash this slipcover and you can already see threads pulling free.
4. Sew Close to Piping
If you are using any kind of piping, you want to make sure you are sewing the pieces as close to the piping as possible. I use a zipper foot to get as close as I can to the piping.
I bought this Waverly cording form Goodwill for $1 for about 6 yards! It was originally $5.99/yard so at 3.5 yards, I saved about $19.97. Woo Hoo! At any rate, I couldn’t get too close on the first pass.
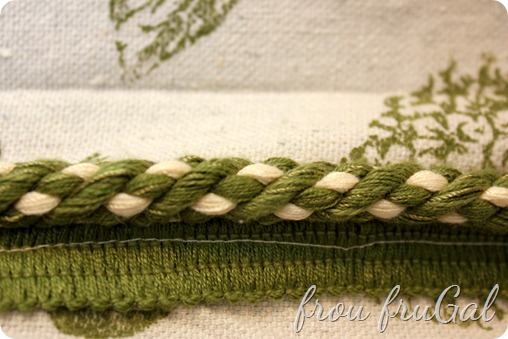
You can see how my seam dips down where the edge of my zipper foot caught on the piping. When you have all layers of fabric together, though, there will be a layer of fabric over the piping. This allows you to get your zipper foot right along the edge of the piping for a tight fit.
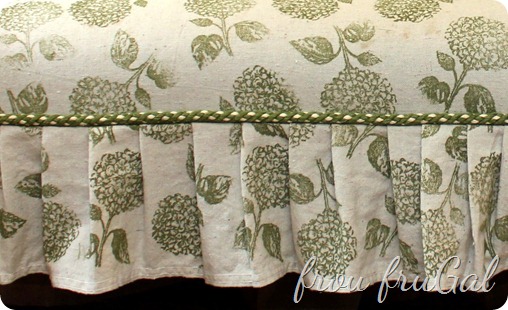
Sew the piping so it lays up and not down for the best overall look. Trust me on this one. I did it both ways and up is better.
I sewed my pleats the same way I did for my pleated pillow sham.
5. Leave An Opening
The curved arms of this bench required some kind of opening at the sides to help ease the cover on. I thought about sewing the front side closed and just leaving the back open, but after taking the slipcover on and off a few times, I thought it would stress the seams too much. I wanted something that would hold things tightly, though, so I came up with a good solution.
I dug in my stash of ribbon and found some large grosgrain ribbon with velcro on the ends that I had saved. They came with a couple of blankets we bought a year or so ago and I threw them in my stash thinking they might come in handy some day. I love it when I do that.
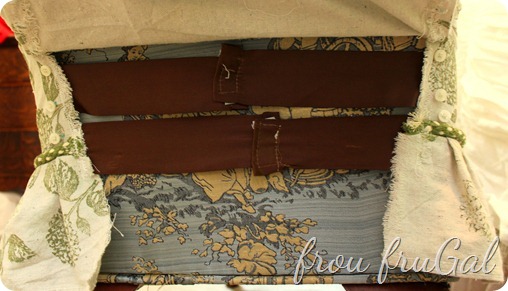
These ribbons were a great solution to hold the sides down. I also dug through my stash for some buttons for each of the side panels. Whenever I have a dress shirt that is ruined, I make sure to harvest the buttons off of it before tossing it.
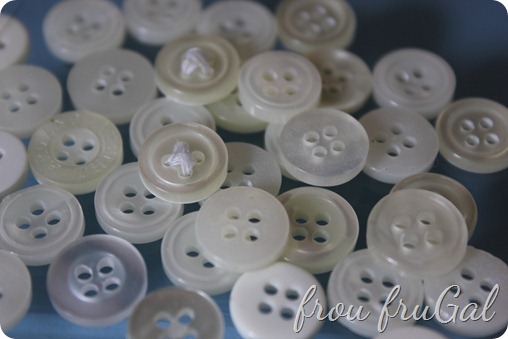
Now, if you’re an eagle-eye, you can see that my buttons are closer together on the right side then on the left. Meh. I noticed, too, but I honestly don’t care. If you knew the depths my perfectionism has sunk me in the past, you’d know that I am well on the road to recovery just by that statement alone.
I briefly debated re-cutting the side panel, stamping the new panel, ripping out the pleats and the cording and the gathers and re-sewing everything. However, no sooner did the thought enter my mind than I kicked it to the curb. I can handle wonky button placement over picking out gathered stitches.
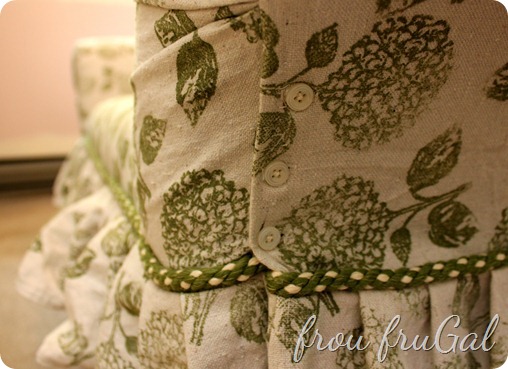
Unless you are bending down or standing at a very strange angle in my room, you can’t see the buttons anyway, so it’s all good.
I wish I could have figured out a better way to make the cording come together, but there just wasn’t a good way. It’s thicker than most piping and putting three layers of it there at the join does make it pooch out a bit. Again, not super noticeable, especially if you aren’t looking for it. It’s just one of those perfectionist things in me.
Cost Breakdown:
-
Drop Cloth – $7.38 (I used about half of a $14.75 drop cloth)
-
Piping – $1.00
-
Paint – $.99
-
Velcro Ribbon and Buttons – Stash on hand
Total Project Cost – $9.37
Total Project Time – About 5 hours, including painting the fabric.
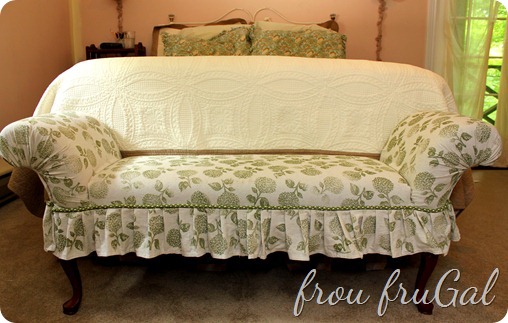
For the record, I thought about painting the legs. Even though they look like wood, they are actually plastic. For now, I like how the legs tie in with the other wood pieces in my room so I’m going to leave them be.
Also, you may have noticed in my first shot that painting has begun. My walls looks a bit like an Easter basket threw up on it. I have finally chosen a color and painting my room this weekend. Also, I will be staining the wood for behind my bed.
Here’s a list of what I still have left to do in this room:
-
Paint the walls & ceiling
-
Stain the boards for tongue and groove wall
-
Install wood wall
-
Finish trim around closet doors
-
Finish installing baseboards
-
Make heater cover
-
Paint and caulk all trim and baseboards
-
Hang curtain rods
-
Make curtains
-
Make night stands
-
Repaint dresser or replace dresser – still deciding
-
Create artwork for walls
-
Make slipcover for armchair
At the rate I’m going, I may have it done in time for as our anniversary present for next year! We will be celebrating the big 25. Hopefully, I can gain some traction on this list, but once I have the walls and the trim work done, I plan to shift my focus to some other projects around the house that need to be done while the weather is good.
Are you working on projects for the Memorial Day weekend or are you going somewhere fun? We may try to sneak up to Lake Erie on Monday, but we don’t have any set plans.
Suesan
You can check out my other bedroom makeover projects: Bedding/Bed Skirt/Headboard, Pleated Pillow Sham, Custom-designed Chair Seat, Chair Refinish, Pottery Barn Knock Off Quilt, Industrial Lights & Fandelier.
I’m linking up at the parties in my footer, plus Beneath My Heart’s Best DIY May Projects Party and
