Christmas Bulbs
I’ve been making some new ornaments this year. It all started with a trip to Goodwill where I found 2 gallon baggies full of plastic Christmas bulbs for $1.50 each.
Hoo Doggie, these bulbs have seen better days! I figured I could spruce them up a bit. There are about 50 bulbs in each bag, making them about $.03/each.
First up were all the dull bulbs. I sorted those out and decided to do the same faux mercury glass technique that I did on my bird. My pictures are better this time around, so I’ll repeat the process for you.
1. Spray with water – You want a spray bottle that will spray a light mist so small beads of water form on the object. I use an old hair spray bottle for my mister.
2. Spray paint over the water – Don’t wait for the water to dry. Grab the silver spray paint of your choice and spray right over the water. I used Krylon’s Sterling Silver spray that I picked up for super cheap during a close out sale at a local craft store.
3. Repeat steps for all sides – I had to get creative to figure out how to adequately cover all sides of the bulb. My method included large garbage liners, a furniture dolly, an old bed frame and some twine. I totally McGuivered that one, Baby.
4. Scrub off Paint Bubbles – You want to wait long enough for the paint to dry and not be tacky to the touch, but not so long that the water dries. I use an old tooth brush and an old t-shirt to wipe off the bubbles. Either one works well.
5. Repeat steps as desired. If you want a more layered look you can add more water and spray paint. I wanted the color from the bulbs to show through, so after I rubbed off the bubbles, I sprayed a very light layer of the spray paint to give some extra shine but still kept some of the color showing through.
6. Fleck with Antiquing Glaze – I use Valspar’s Antiquing Glaze and dip a stiff brush into the glaze. I run my thumb across the tip of the brush to splatter the glaze onto the bulbs. It’s a technique I perfected in Mr. Leque’s 4th grade class.
You could leave the glaze off if you wanted. I like the aged look it gives to the bulbs. The total cost for 50 bulbs is $1.50 since I had the spray paint and glaze on hand.
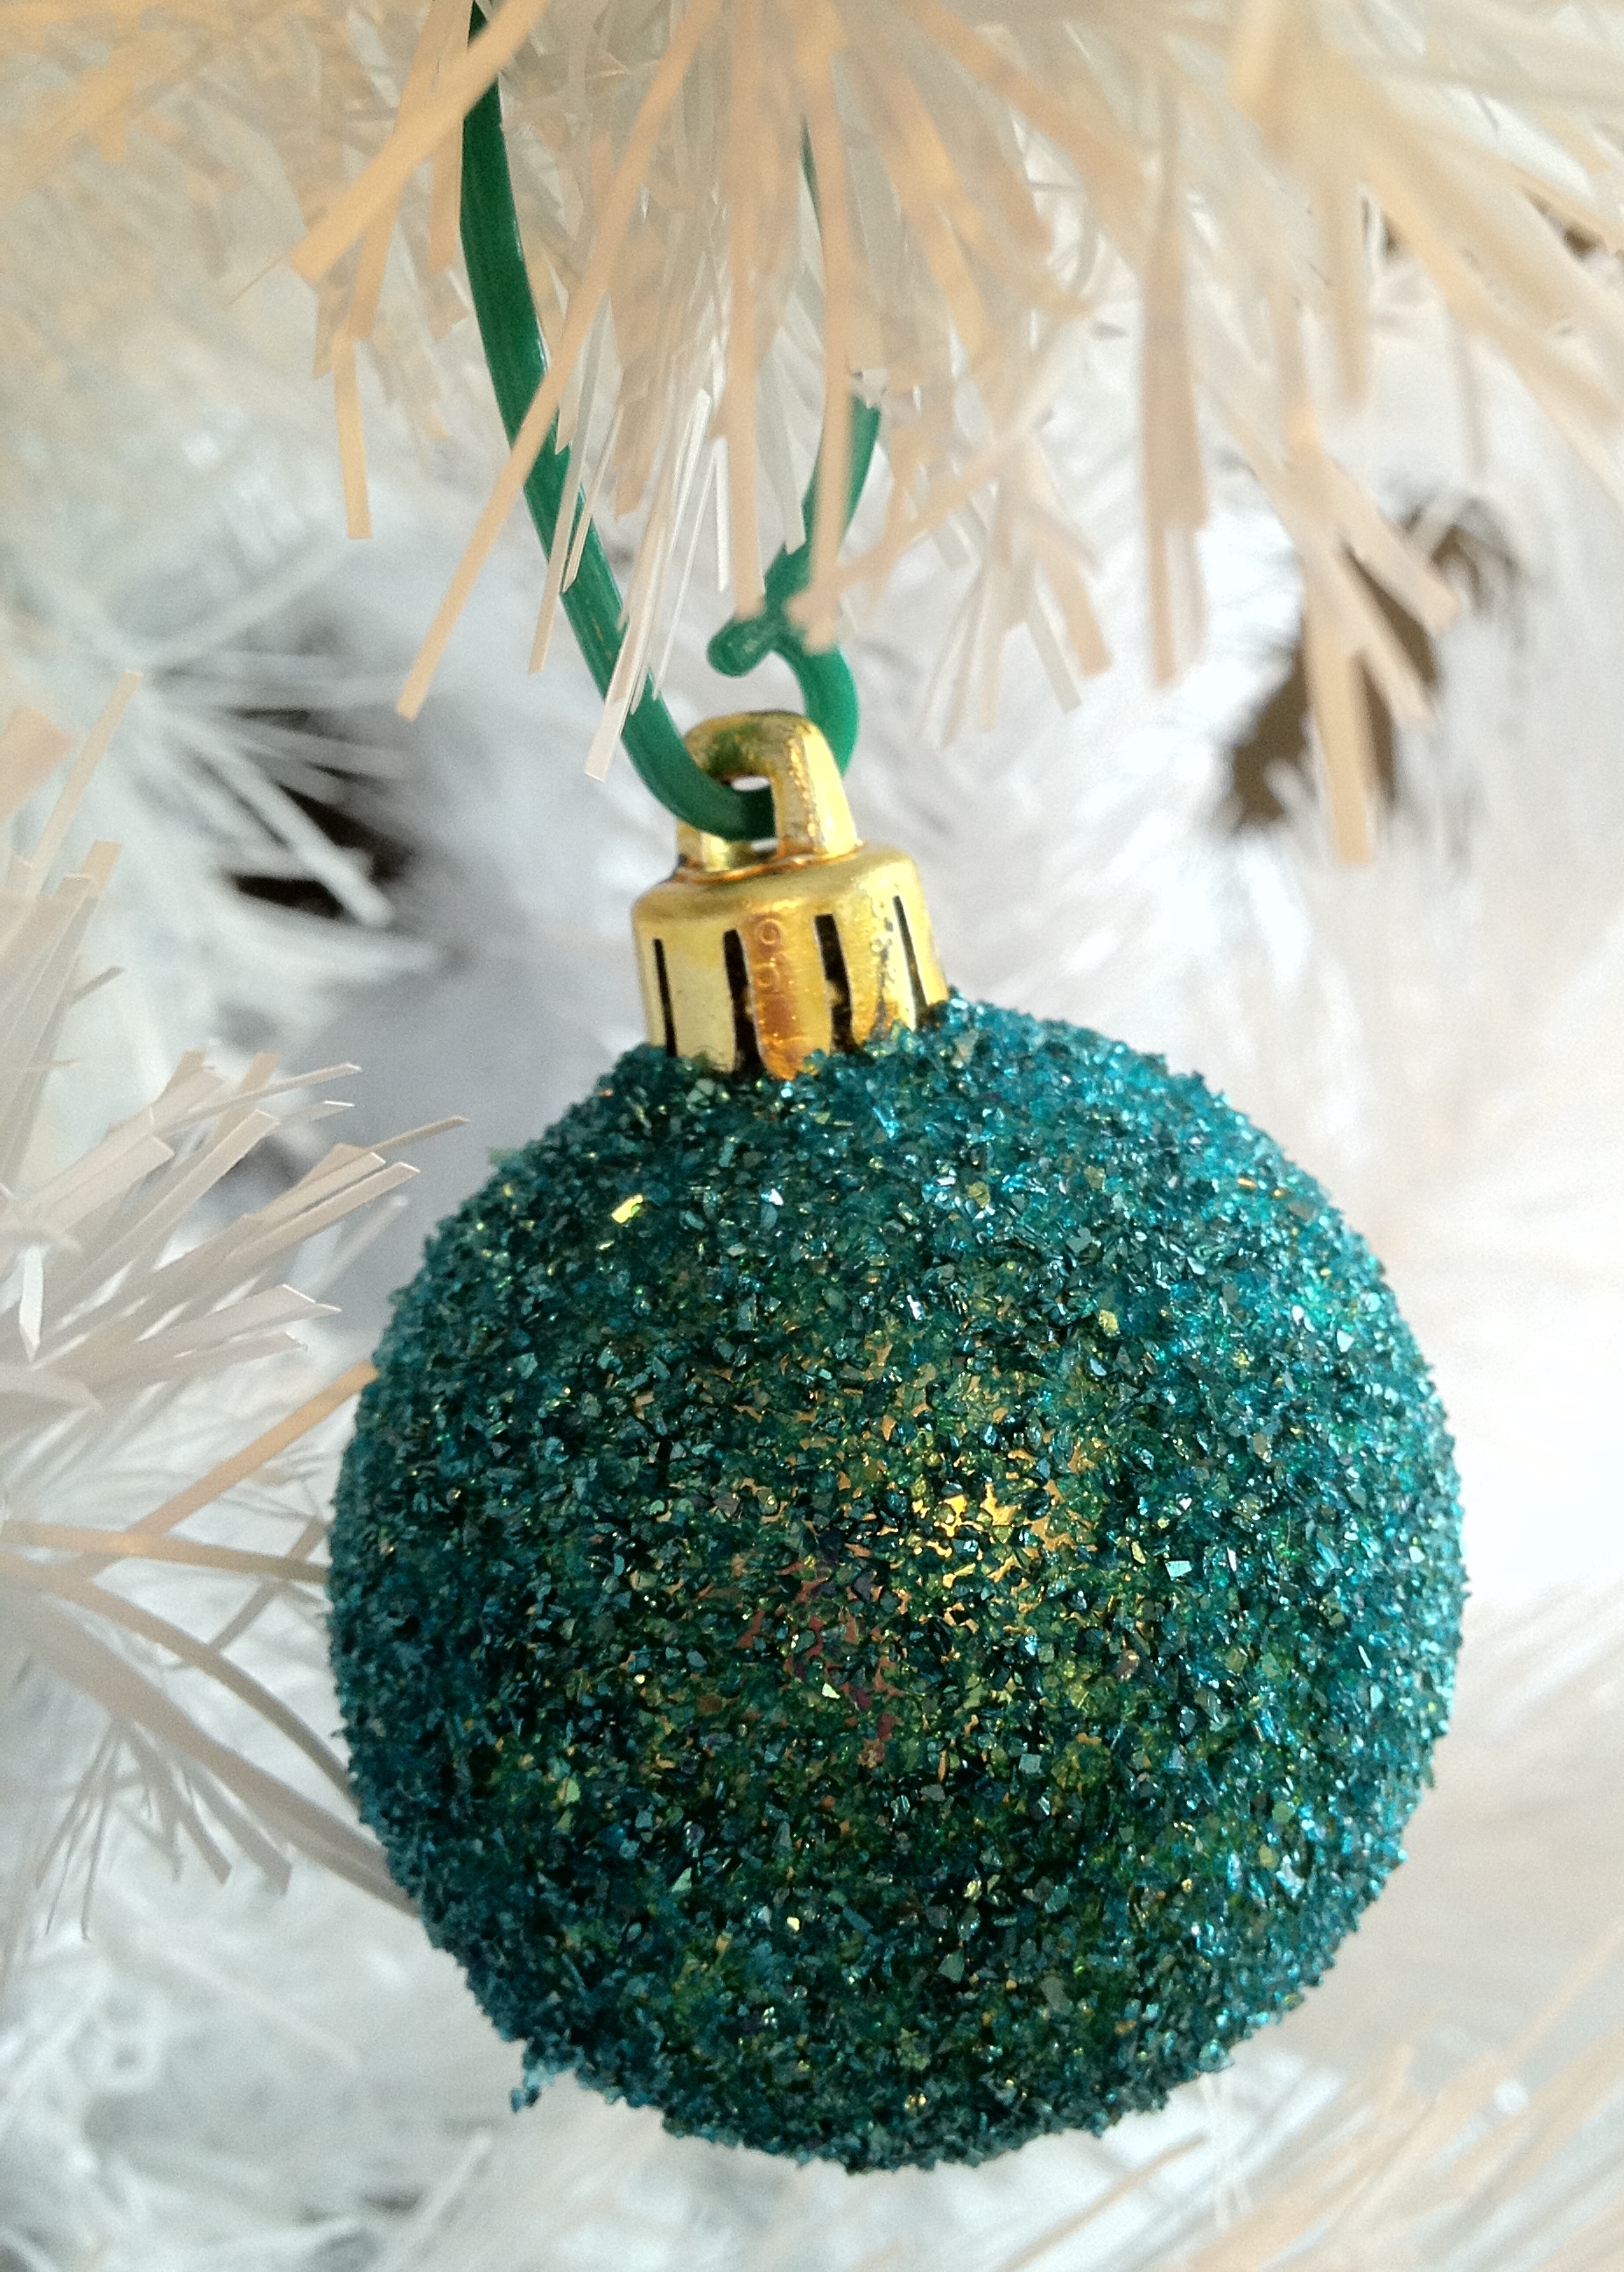
For the rest of the bulbs I pulled a page from Miss Mustard Seed’s book and decided to try out the German glass glitter. It is every bit as delicious as Marian claims. I bought both silver and sapphire, which is really more of an aqua color. I love how the colors of the bulbs show through the glitter.
I used regular Elmer’s glue for some and Mod Podge for others and honestly, they both shed equally. I’ll save my pricey Mod Podge for other projects.
It’s a fun way to add some new life to some old bulbs. I bought the glitter from a gal on eBay. She was very prompt with the orders and even sent a free sample of the pink glitter for me to try out. You can find her eBay store, here.
It was $8.71/each for 4 oz. of silver and sapphire glitters, with shipping. I had just enough to cover 50 bulbs, which makes the cost of these ornaments at $18.92 for 50 or $.38/each.
My next ornament came about from some left over cotton yarn. I crocheted some washcloths this year to give to a couple of friends. The pattern used up nearly all the yarn except one ball must have been bigger than the others because I had quite a bit left over, which led to me trying out this star pattern I pinned.
Source: jellywares.blogspot.com via FrouFruGal on Pinterest
I had a small red glitter Joy ornament that came with two other words that I used in another project. I just wove the silver cord on the Joy ornament through the crocheting on the back to hold it in place. Here is my version.
I ended up giving this one away at a Christmas ornament exchange party. The gal that won it loves to crochet as well so I think she was happy to get it. I haven’t made any more yet because I need to pick up more of the word ornaments. Walmart sells them for about $1 or so for the three words, making this ornament cost about $.33 since the yarn was from my scrap pile.
Last, but certainly not least, is my favorite ornament I made this year. It’s my snowman parts ornament.
To make this ornament, you will need:
-
1 tablespoon Epsom Salts
-
2 black sequins
-
5-6 Black beads
-
Orange Clay nose
-
2 Twigs
-
Scrap of felt or wool
-
Clear glass or plastic ornament
I only had to buy the ornaments because I had everything else hidden in my stash, including the clay nose from a snowman project back in ‘02 or so that I’ve been hoarding ever since. We made those out of orange Sculpey clay.
I had an old wool blanket that I’ve been using for different projects since it was too beat up to use as a blanket. I just cut a strip off of it and fringed the ends to make the scarf. I would have preferred a red scarf, but ya use what you got, am I right? To make the ornament, just pour/stuff/ease everything into the bulb.
I thought it would be fun to put some words on this ornament. I considered “I’ll be back again someday” or “In the sun he melted, melted, melted” which is some words for a song the kids sing at church. I found a saying I liked better, though.
It says, “Some Assembly Required” which just makes me smile. I used some black vinyl that I cut out with my Silhouette using the AR Christy font. I also gave one of these away at the ornament exchange and to a friend. Hubs is giving a couple away to some co-workers. I did save one for us. Total cost for 6 ornaments was $5.94, which was the cost of the bulbs.
I also made the faux capiz shell garland for the tree this year, which I really like. It was super easy. Iron two sheets of wax paper together. Punch out circles with a 2” paper punch. It actually works better if you punch out several layers at once. Sew together and there you have it. I think I need one more strand for the tree.
I bought my punch from JoAnn’s for about $10 during one of their sales. A box of wax paper is under $3.
I don’t always make ornaments every year, but I did this year and I’m very happy with the results. I will show you the trees another day. What ornaments are you making this year? There’s still time to try some out.
Cost Breakdown:
-
Faux Mercury Glass Bulbs (50) – $1.50
-
German Glitter Glass Bulbs (50) – $18.92
-
Crocheted Ornament – $.33
-
Snowman Parts Ornament (6) – $5.94
-
Capiz Shell Garland – $13.00
Total Project Cost – $39.69
That’s money well-spent for decorations that will give me many years of enjoyment.
Suesan