Bench Cushion & A Fail
With my life being hijacked by all things non-creative, I thought I’d catch you up on the chair bench.
When we last saw Chair Bench, I’d painted and primped it out to this point. I was trying to figure out what to put in the oval medallion areas. I also wanted to make a cushion for the bench.
I went to JoAnn’s and purchased some Nu Form batting that’s made especially for outdoor projects. It’s resistant to mildew, which is important in a high-humidity state like Ohio.
This stuff is not cheap, but some things are worth the extra cost. I had a 40% off coupon, so 1.5 yards cost me $21.08. My bench isn’t as wide as the batting, so I had to cut off about 12 inches along the length. I may try to make a pillow or two with the left over.
Because the batting is so thick (2” deep) I cut through half the thickness, and then came back and cut the rest. If you have an old electric carving knife, that might have worked, too. But save your hands some grief and cut it in stages if you don’t have that tool.
I bought some outdoor canvas from JoAnn’s when it was on sale for 50% off. This fabric is normally $19.99/yd! Ye-outch! That’s too rich for this girl’s blood. Even on sale, I balked a bit at paying $10/yd for it.
I found a couple of prints that I liked. I liked the bright colors and the happy flowers, but the black was too jarring to me for some reason. The fabric was really too bright in real life.
Here’s the same fabric, but in softer colors. I really liked the lighter tones, but I thought this was a little too pale for the bright summer sun.
Finally, like Goldilocks, I found one that was juuuuusssst riiiiiiight.
I love the greens and blues, and it cemented my decision to paint the bench the bright sapphire blue. The little white flower design from the fabric were my inspiration for the embellishment on the bench. I liked how the scalloped shapes around the medallions match the shapes in the chairs.
I wanted to buy the matching blue or green canvas and use that as piping for the cushion, but I was already pushing the limits of my budget on this project. I bought 1 yard of fabric and decided to do a Tim Gunn and “Make It Work.”
Fold the fabric in half, the long way, and place the batting inside the fabric so the front edge of the batting (the widest part) is against the fold. This puts the seam in the back where no one will see it.
Pin around the cushion to show the exact shape of the cushion. Once it’s pinned, use a fabric pencil to trace along the pinned line. Remove the pins, pull out the batting, and cut out the fabric.
Sew along the blue line. I left a large opening along the back because I didn’t want to mess up the batting by trying to force it through too small of an opening.
To allow for the depth of the cushion, box the corners. To box the corners, open up the fabric and match the top folded edge of the cushion with the side seam.
If you look at the picture above, you’d want that folded edge at the top of the picture to match up with blue sew line on the left. This will make a triangle point.
Measure across the width of the triangle, until you have the height of the cushion. My cushion was 2” tall. I moved my ruler away from the point of the triangle until I had two inches wide. Mark line with the fabric pencil and then sew across the line.
The boxed corner gives height to the sides of the cushion. If you don’t box the corners, your cushion will be flat along the edges.
I used a blind stitch to sew the cushion shut.
Finally, the last thing I needed to do on the bench was come up with the design for the ovals. I had a lot of great input from my readers. I ended up putting a monogram in the center oval.
The font is a modified CAC Shisoni Brush font. I stretched out the bottom leg of the K.
For the side ovals, I did a larger version of the flower.
I forgot to mention it in my first post, but I used Elmer’s Painter marker to do all the white embellishment.
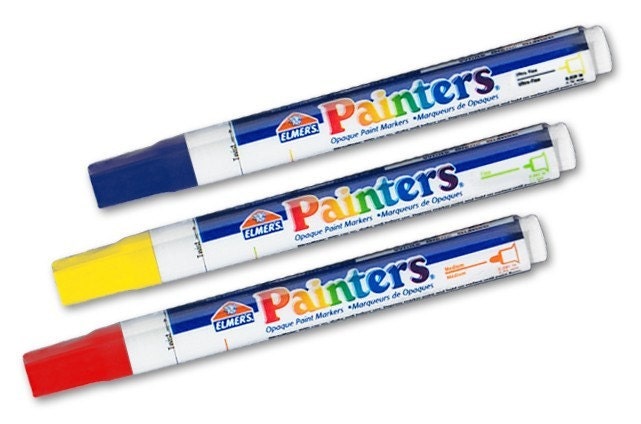 It put a nice white coverage over the bright blue and the paint flowed really well in the marker. I was very happy with this marker. I had a Zig Painty Pen that did not perform well at all. The paint was thin and did not look white on the first pass.
I really love how it all turned out and came together.
I also added a little something along the arms.
If only I could close the chapter on the bench right here. In the interest of full-disclosure, I need to point out the fail. It was me. And my impatience. And maybe a dose or two of forgetfulness.
A few days after I got finished with the bench, I was reminded why it is so important to thoroughly clean any piece prior to painting. Especially pieces from a kitchen or dining area that are likely to have oils on them from cooking and/or handling.
D’oh!
Paint (even one that has two coats of primer under it) will blister in hot weather when the underlying surface is not properly cleaned. Since I did this project in stages, I jumped into the painting part and my light cleaning was not sufficient.
It also bubbled on the arm. I’ve left it alone to see if any other blisters form. Once we get moved in, I will have to remove the blisters and thoroughly clean and sand the area before I repaint it. But, hey, now I can show you all how to fix blistered paint!
Cost Breakdown:
-
Chairs, Boards Paint, Primer & Urethane – $38.38
-
Outdoor Batting – $21.08 (1.5 yds @ 40% off)
-
Outdoor Canvas – $10.00 (1 yd @ 50% off)
Total Project Cost – $69.46
Suesan