Map Butterflies
When I held my Freschetta Simply Inspired Giveaway, I told ya’ll that I’d make a little something extra for the winner.
Cassie was the winner and after some debating and procrastination on my part, I came up with a fitting project for her. I asked Cassie to give me 4 places that meant something special to her and her family. I originally planned to do a knock-off version of this butterfly art that I found on Pinterest.

Maps + Butterflies = Genius in my mind.
I had to give this a try. I used my Silhouette for cutting the images and I’ll do another post to show you how to do that. Today, I’ll show you how I did my project.
I started with this shadow box I found at the local Goodwill for $2.92. I was so excited to get started, that I’d already removed the glass and ugly picture in it before I remembered to take a photo.

I whipped out my can of Oil-Rubbed Bronze and got to work. After a couple of coats of paint, I took my Krylon Silver Leafing Pen and colored the top of the frame with silver.
I was only going to do the rounded section with the silver and the inner edge, but my coloring skills need work. So the whole top became silver. I aged it with a bit of Antiquing Glaze.

For the back, use foam core board. I used a scrap I had on hand. I covered the board with some spray adhesive and some leftover drop cloth from my map settee and my cane back chairs.
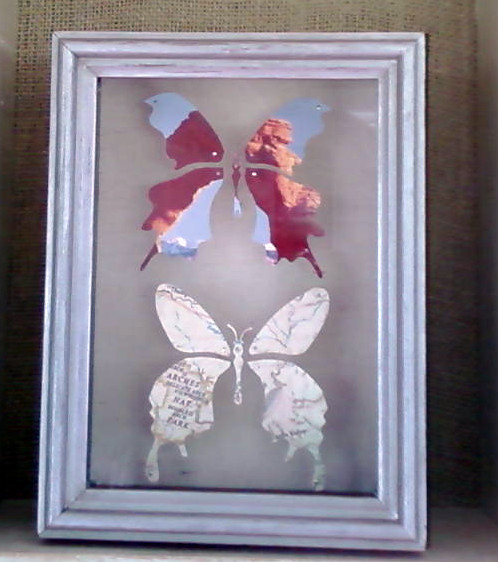
Cassie told me that Washington, DC; Simi Valley, CA; Moab, UT; and the Salt Lake Temple in UT were places that had meaning to her family. Originally, I planned to create four butterflies for this frame. After playing with the images, though, I felt like the frame was better suited for 2 butterflies.
I will spare you all the mental deliberations I went through. Let me sum up by saying that I finally settled upon a picture of Delicate Arch near Moab, Utah and a map of the same spot. You may have to play around with several pictures to get one that you like.

Insert your picture into the Silhouette software and place the butterfly outline over it until you like how it looks. Mine involved a lot of repositioning and resizing of the picture to get it just right.
Print a test run in black and white and cut it out to see how it looks before printing in color. I don’t know about you, but I hoard my usage of the color printer. That ink is ridiculously pricey. Good thing I got the printer for free!
Once you have a successful test run, do a final print and cut. I used the print and cut feature on the Silhouette to make sure the butterfly cut out in the right location. All I can say is “Wowsers!” If you haven’t used that feature yet, it’s AWESOME!
Using some straight pins, pin the butterflies into place. I pushed the pins into the foam core. They naturally stop at the after they get through the foam part. It made the pins nice and level.


Place the back into the frame and shoot a few staples into the sides to hold it in place.
Make sure when you do this step that the butterflies are not in upside-down before you do the staples. It might save you a step or two. I’m just saying.
I created a label and put it on the back, too.
The part that thrills me the most about this project…that I actually got it wrapped up and shipped out today!
You don’t even know how much little tasks like that set me back sometimes. I count my day complete today that I got this mailed out and Miss Cassie will have her new art (and cutting board and free pizza) by the end of the week.
I hope she likes it. I definitely plan to do more of these in the future. I’m already gathering images and maps from favorite places.

Cost Breakdown
-
Shadow Box Frame – $2.92
-
Spray paint, leafing pen, canvas, foam core, print paper, pens – Stock on Hand
Total Project Cost – $2.92
Total Project Time – About 6 hours. Don’t judge. There was a huge learning curve here and my brain is still slow these days.
I’ll be detailing my steps for creating the butterfly shapes for Silhouette for you soon so your project may only take you an hour or two.
Suesan
Be sure to check out the parties on my sidebar!