Hobnail Milk Glass Lamps, Part 2 – Shades
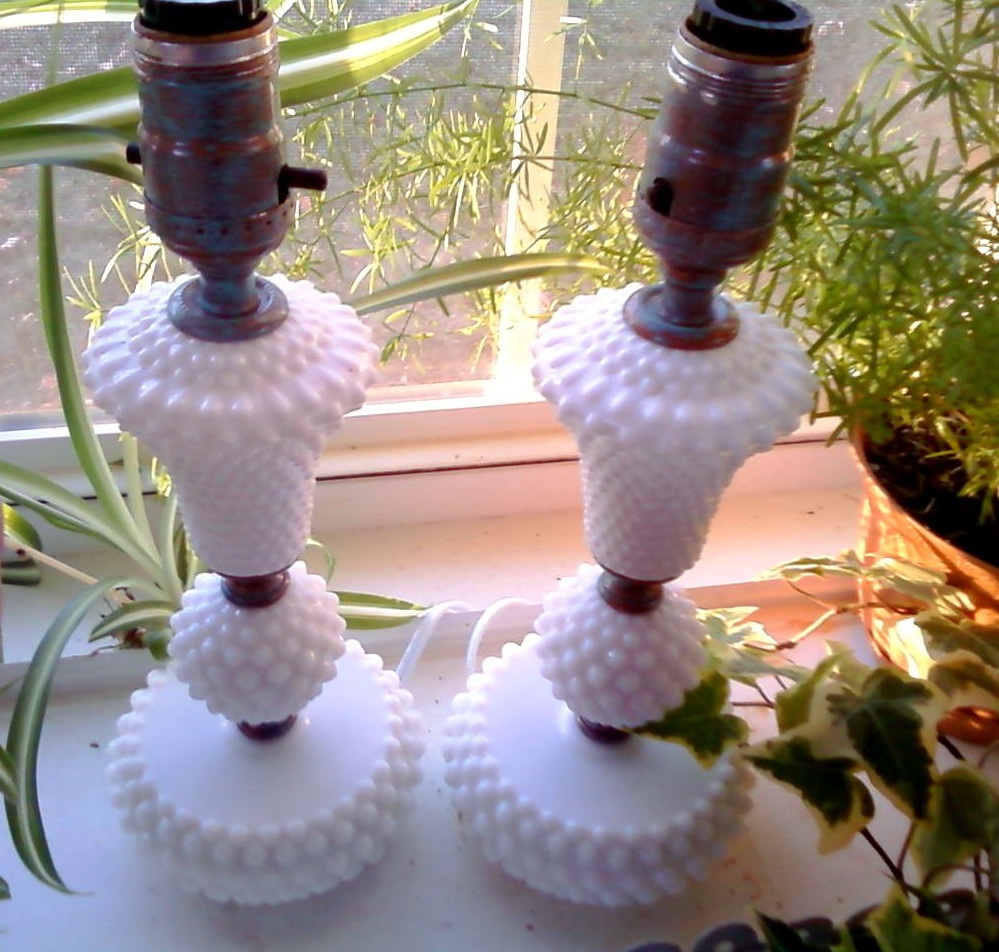
I finished the lamps several months ago, but it took me awhile to figure out what I wanted to do for the lamp shade. I thought about a burlap shade. Meh…there’s a bazillion burlap lamp shades out there and I wanted something a little different. I have a quasi-beach cottage theme going on in my house, and I wanted to find a way to make the lamps feel beachy.
I was looking out my window, pondering what I should do, when I got a vision of my lampshades. Literally.
Take a look:
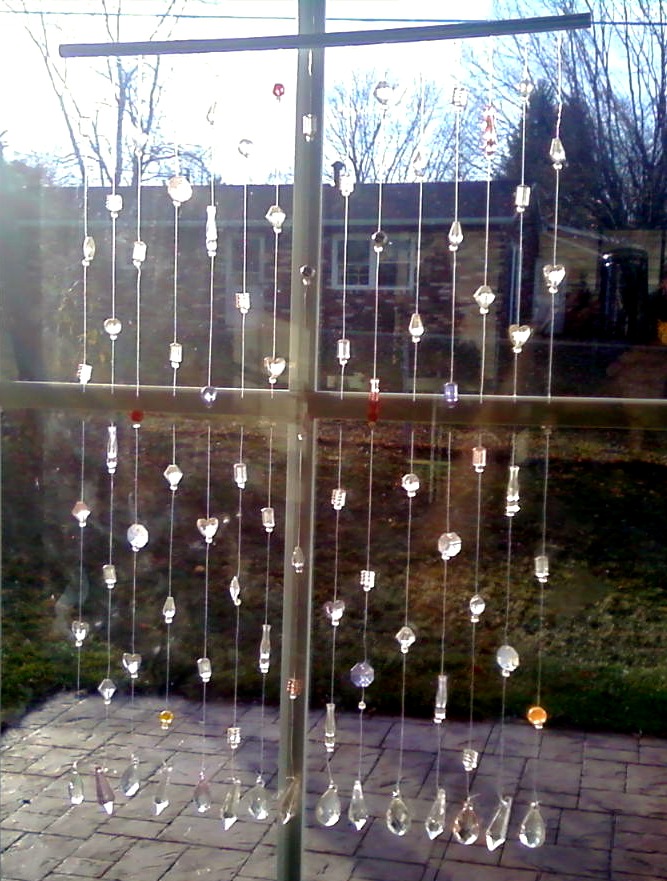
I bought this sun catcher for $5 many years ago when I was at a garage sale. It wasn’t actually for sale. It sparkled and caught my eye. The woman offered to sell it to me. Yes, please!
I’ve wanted to make my own for years. I’ve just had too many other projects, and you may know I suffer from P-ADD
(Project-Attention Deficit Disorder–it’s not widely diagnosed, but far too many people suffer from this disease. The cure may involve chocolate and dancing, or so I’m told).
Wait, what was I saying? Oh yeah, I wanted to make a beaded lamp shade.
I did. Wanna see it? I’m thrilled, Thrilled, ThRiLlEd THRILLED with how it turned out?
Can you tell I’m happy?

I know, right?
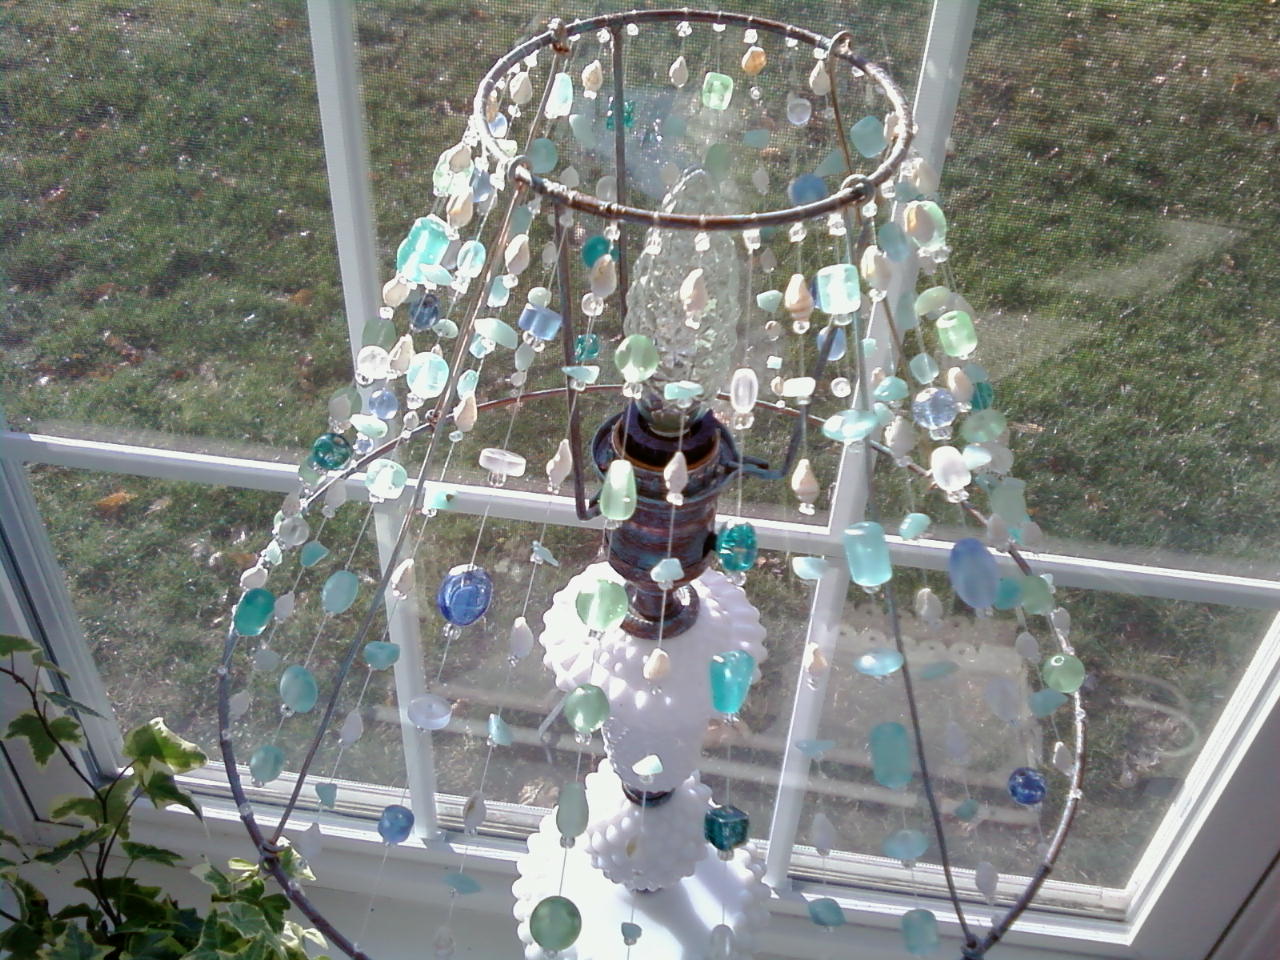
How stinkin’ PRETTY is this lamp “shade?” I may even have cured my P-ADD!
Okay. I’d admit I have an overflowing love for glass + light = Shiny Love, but it just pushes my Happy Buttons all over the place.
Want another look?

Yes, those are sea shells on there.
Here’s what it looks like at night, with the light shining through it.

Now, to be real honest, this project thwarted me for MONTHS!!! It is sometimes hard to translate what you see in your head into an actual thing. Especially when you kind of shoot yourself in the foot.
I have to admit, that I now understand Thomas Edison a little better after this process. I did not fail, I just discovered 500 ways to NOT make a beaded lamp shade.
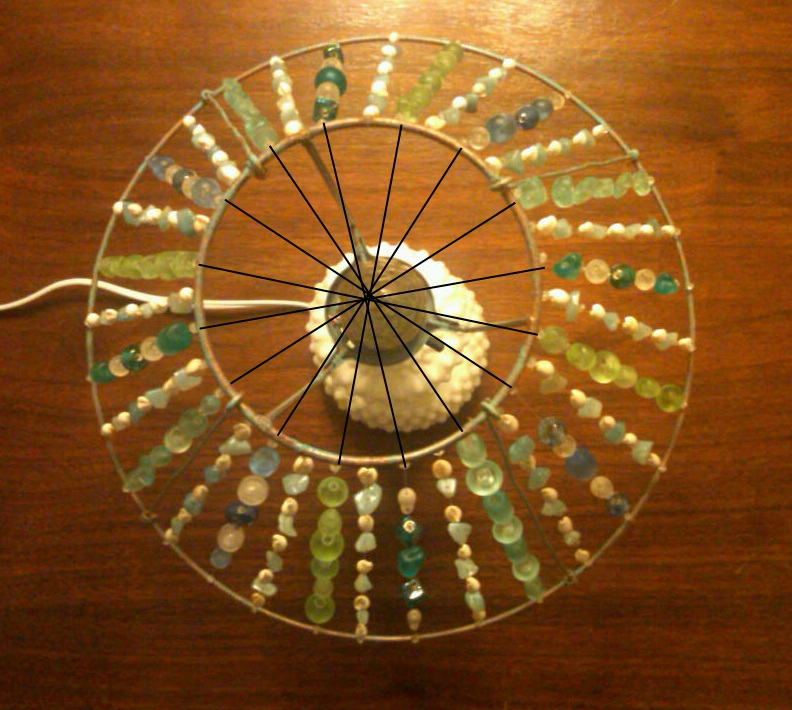
Finding the Right Shade is KEY. Sadly, I did not have anyone to tell me this and I, um…bought the wrong shades. In my defense, the P-ADD still had a strong hold on me at that point in the project. I spent several weeks hitting the Goodwill in hopes of finding the exact size and shape of shades I needed.
I’d forgotten the first Law of Thrifting, which states that Need and Supply are conversely related. The more desperate you are to find a particular item, the less likely you are to find it. Ever. I finally gave in and started shopping the stores for a cheap Frugal shade. I found some in the right shape and size that I wanted, but $15 is too steep to pay for a shade I’m going to destroy.
I settled on this shade thinking I could make it work.
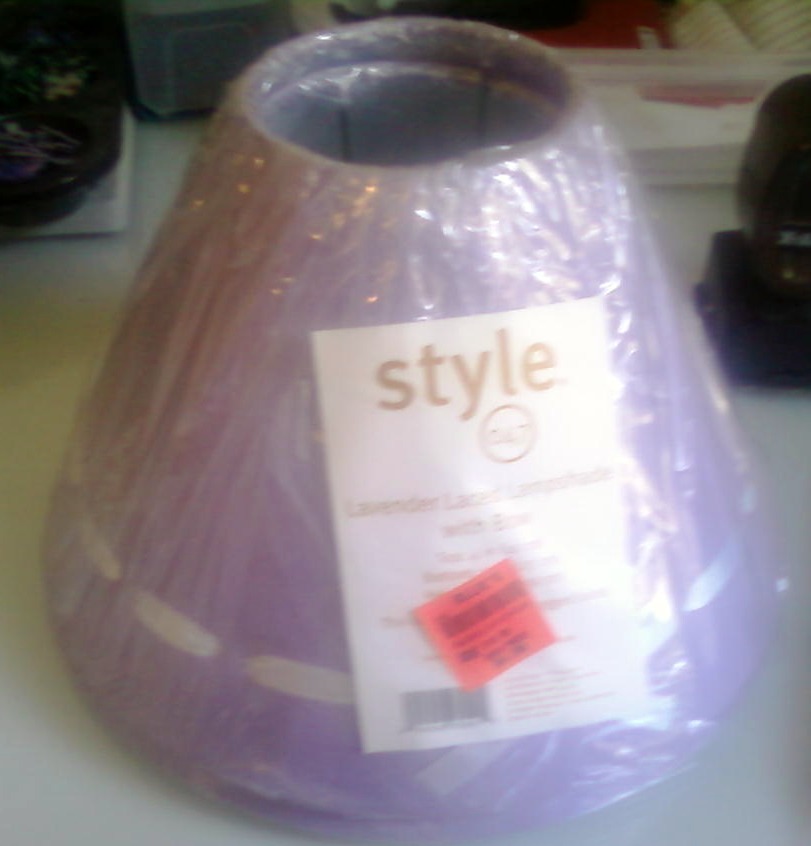
They were under $5 at a local discount store. They even look kind of cute on the lamp.
If Baby Girl wasn’t 19 and out on her own, these would have been perfect for her room.

The problem with this shade is that the only support between the top of the shade and the bottom is the fabric. The very stuff I’m about to tear off and send my P-ADD into overdrive.
I’m not going to lie. I had several failed attempts to figure out how to secure the bottom hoop of the frame without any supports. To spare you the details of my project fails, I’m simply going to say BUY A LAMP SHADE WITH SIDE SUPPORTS IF YOU PLAN TO DO THIS PROJECT!
Phew! I feel better now. I really am that cheap Frugal, that after all my misfires, I wasn’t about to start over and buy different shades. I was determined to make this work.
I came up with some side supports on my own, using a very heavy electrical copper wire. I had to strip the plastic off of it. I cut four pieces the exact same size. This step is critical to ensure the bottom is parallel to the top. I used a jewelers wrap to attach the wires to the top and bottom.
I did the same paint treatment on the frame of the shade that I did for the lamps, using Krylon’s Fusion for Plastic spray paint in the Hammered Copper Finish and True Value’s Color Made Simple paint in Fairytale to give them a verdigris finish.
All my boo boos “practice” lead me to another conclusion. I needed to break out the Big Daddy of Craft Supplies. Me and Big Daddy have a love/hate relationship. I love his strength, his durability. He’s quick.
He. Gets. The. Job. Done.

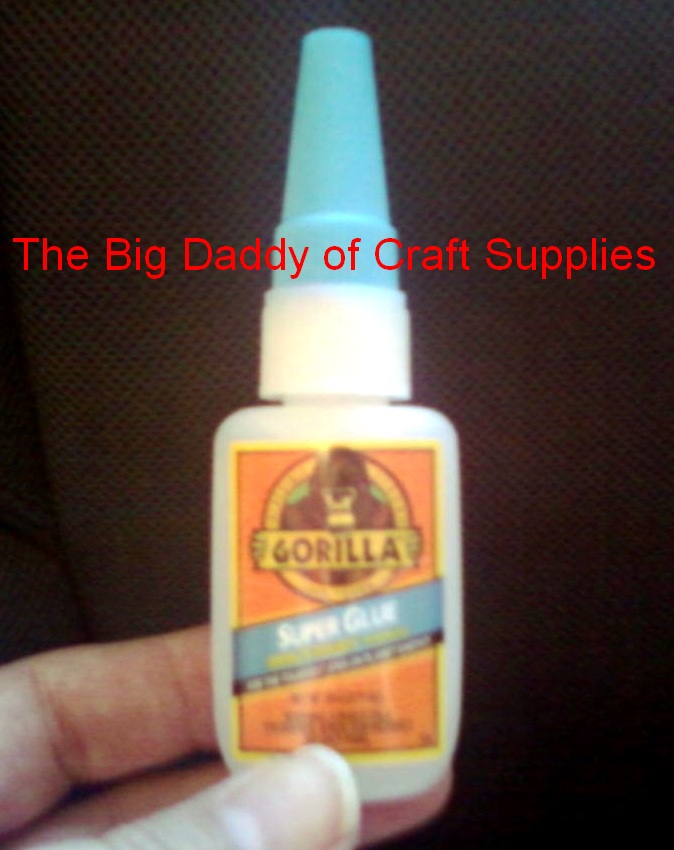
Big Daddy punishes me for my clumsiness, though. Those same qualities I so admire him for, tend to be annoying when it’s you he’s sticking together.

Big Daddy, can you let go of my fingers, please?
Even as I type this blog post, I will tell you that I have an “interesting” manicure going on, which consists of abstract shapes of Gorilla Glue on my nails. It’s not coming off. I’ve whittled most of it down with an X-Acto knife, but I stopped when I realized I was in danger of injuring myself.
Shhh….don’t tell Hubs I did this. He’ll come unglued!
I had some glass beads left over from a purse I made. I bought them from Wal-Mart, back when they actually had a good selection of beads. These are the large shiny beads you see on the shade. I didn’t have very many of those so they are only on every fourth strand. I basically did fourths for my beads. Four dark teal, four blue, four light green, four light teal. In between each of the main strands it a strand of little chips of Amazonite and sea shells.
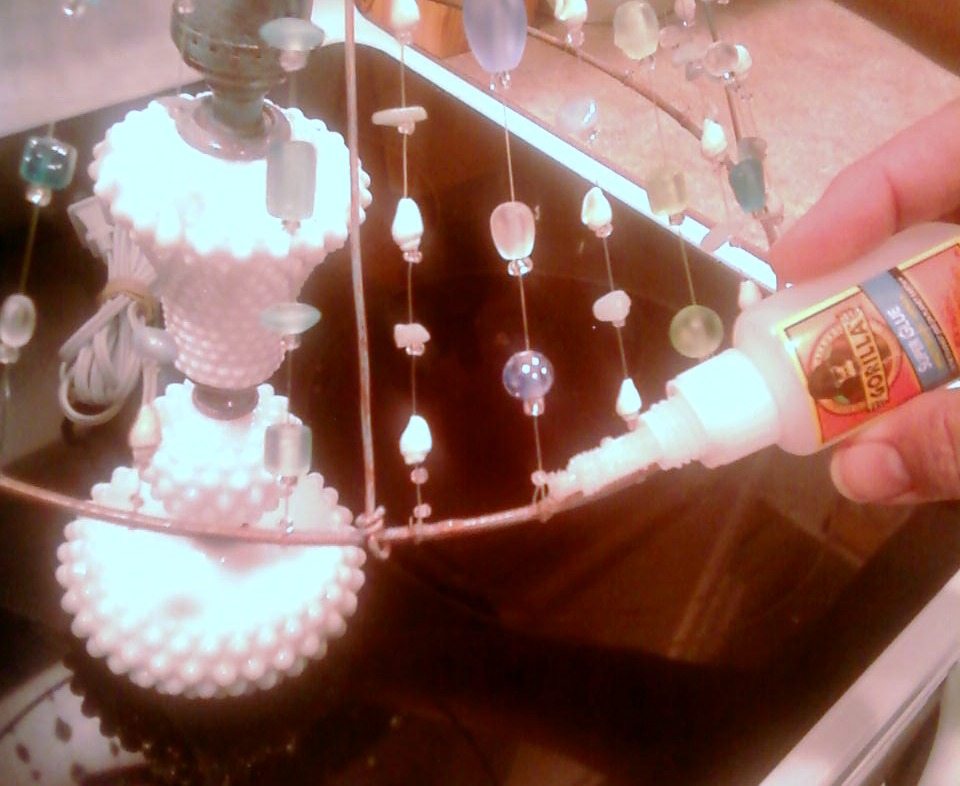
I used Gorilla Glue to secure the knots at the top and the bottom.
This was critical to the project.
I tied the line onto the frame using a tautline hitch for the top knot and a jewelers knot at the bottom. If your knots loosen up, the weight of the beads will cause the lines to sag and change the shape and look of your shade. It’s why I risked gluing myself together!
While it did test the very ends of my patience, I’m so happy with the results that I’m willing to do it all over again for the next shade.
Lampshades – $9.98 ($4.99/ea)
Frosted glass beads (Wal-Mart), Amazonite, Sea Shells and seed beads – $25
Clear Glass beads and line – stash on hand
Total Project Time – Gah! Don’t make me add this up.
Once I figured it out, I averaged about 4 strands of beads an hour for the main strands and 2.5 and hour for the shell strands.
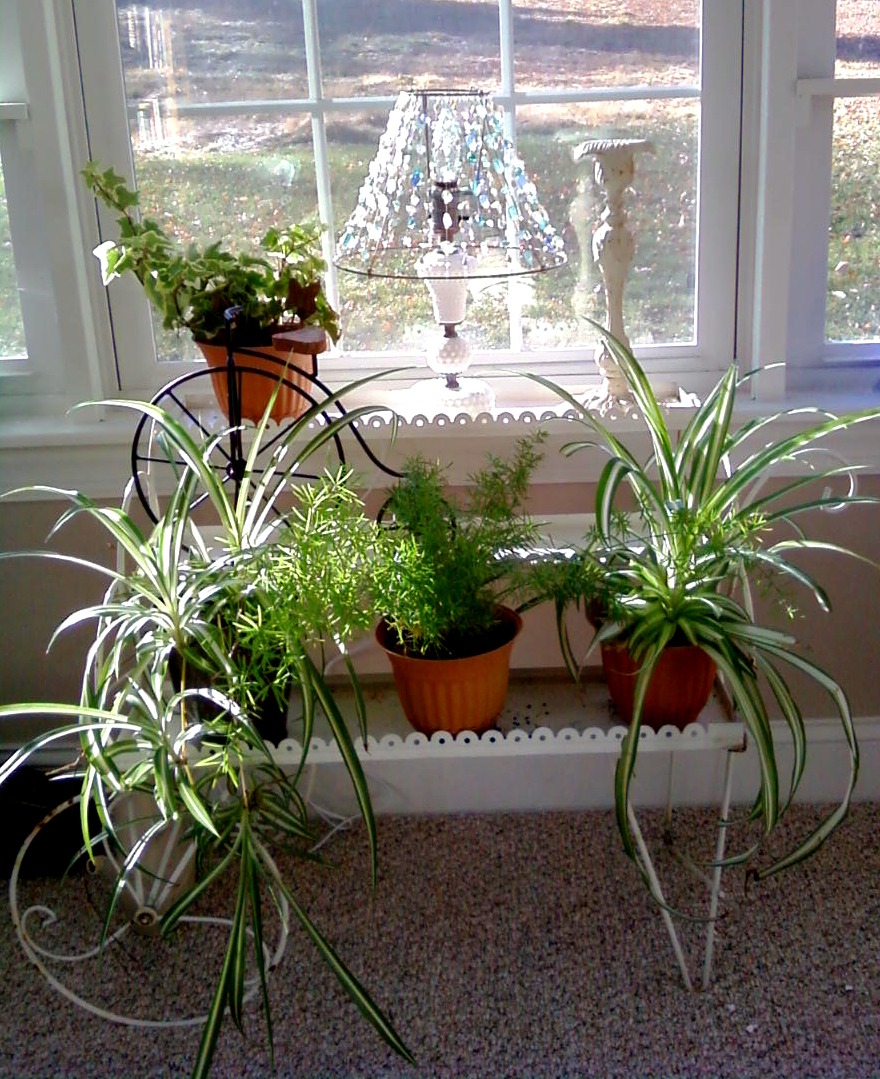
The lamps are going on my piano where I have sacrament trays filled with rocks and shells from all our beach trips over the years. I need the light in that area, but I need to buy lower wattage bulbs for the lamps. I bought faceted 40w bulbs and they are too bright and give off too many shadows.

These lamp shades may not be for everyone, but they are perfect for me!
I’d love to hear what you think of these.

I’m also entering this months:
