From Wedding Dress to Blessing Gown
A year or two after I made Karen’s blessing gown, I found out my brother and his wife were trying to adopt a baby girl from Ethiopia. This was a long process and a few months in, they found themselves expecting a baby girl. I asked if I could make a blessing gown for their girls and they agreed.
I went to the Salvation Army, and this particular store was about as dark and dreary and grungy of any store I’ve ever been into. I always felt the need for a shower after visiting that store. However, they occasionally had some real finds and on one trip I came upon a vintage Jessica McClintock Wedding gown.I failed to take a before picture, but the top looked a lot like this:

The bottom was lace chiffon over an acetate underskirt, but the skirt was lightly embroidered at the top and got more detailed at the bottom. The acetate was yellowed and falling apart. The dress had multiple rust spots. It was brownish with dirt and dust. It smelled badly. It was $12.
I bought it and threw it in the bathtub in hot water with a lot of bleach. I figured it would either be fixed or ruined. The lace survived and here’s what I made.

I tried to do the pleating for the smocking by hand, but that quickly turned into a project fail. I found a woman who charged me about $10 to run it through a pleater, which is a machine with multiple needles that makes the tiny pleats needed for the smocking. For my first attempt at smocking, I don’t think I did half bad.
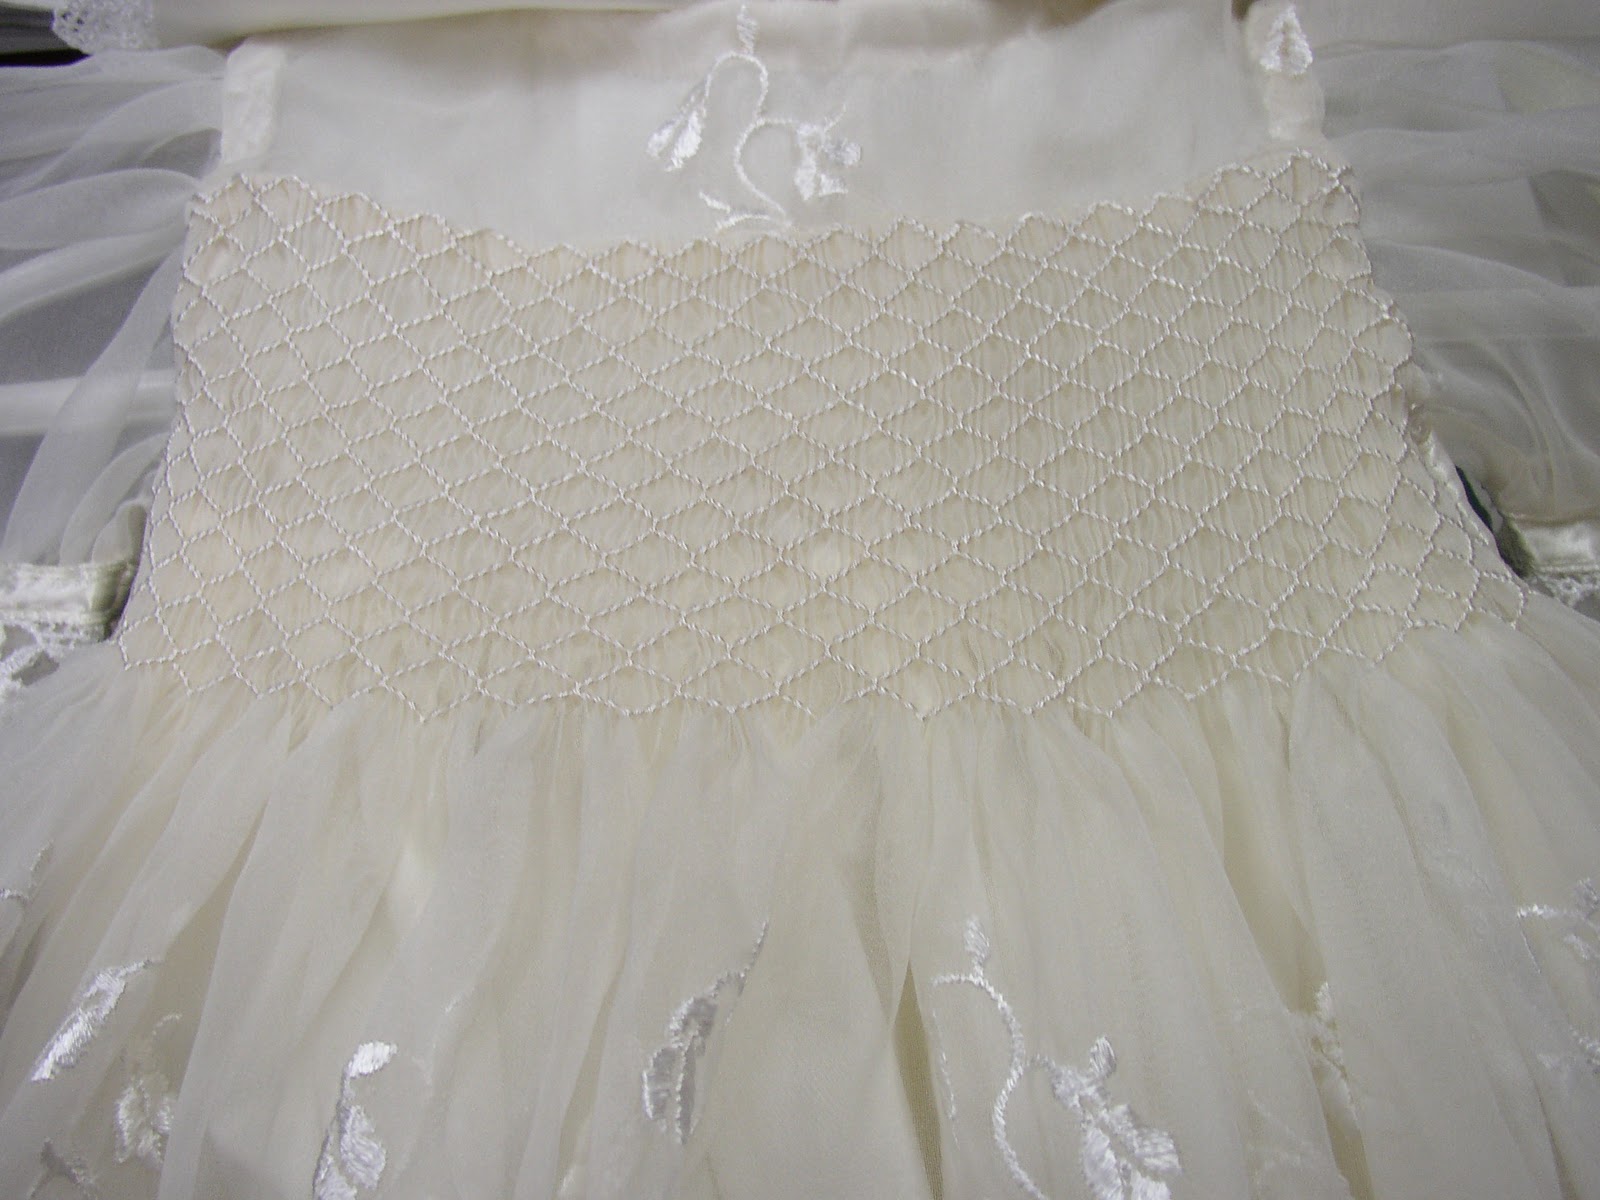
There is something very therapeutic about smocking. As tedious as it looks, I really enjoyed doing this. Back when we were living in Hermiston, Oregon, I was introduced to the artwork of Brazilian Embroidery.

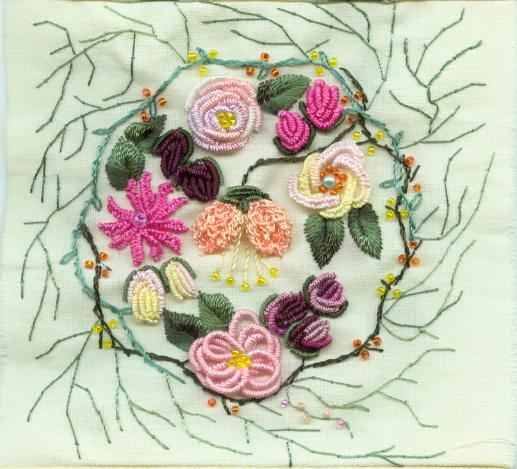
It’s a three-dimensional embroidery that uses different flosses, some of which are very silky. I used some of those embroidery techniques on the collar and bonnet.

The collar is chiffon over satin with the lace edging. It’s no joke sewing all of those slippery layers and I didn’t get it right. I didn’t realize it until the dress was almost finished and after all the hours I put into the dress, I just didn’t want to go back and fix it. I wish I had. Maybe some day, I’ll fix it for my grand-nieces.

I was especially happy with the sleeves. The lace on the bottom of the sleeve, comes off the bottom of the sleeve of the original dress. I just cut it off and made it a cuff for the baby gown. I used the same sleeve pattern from the dress I made for Karen and modified it to fit this gown. It had a satisfying amount of pouf to it.

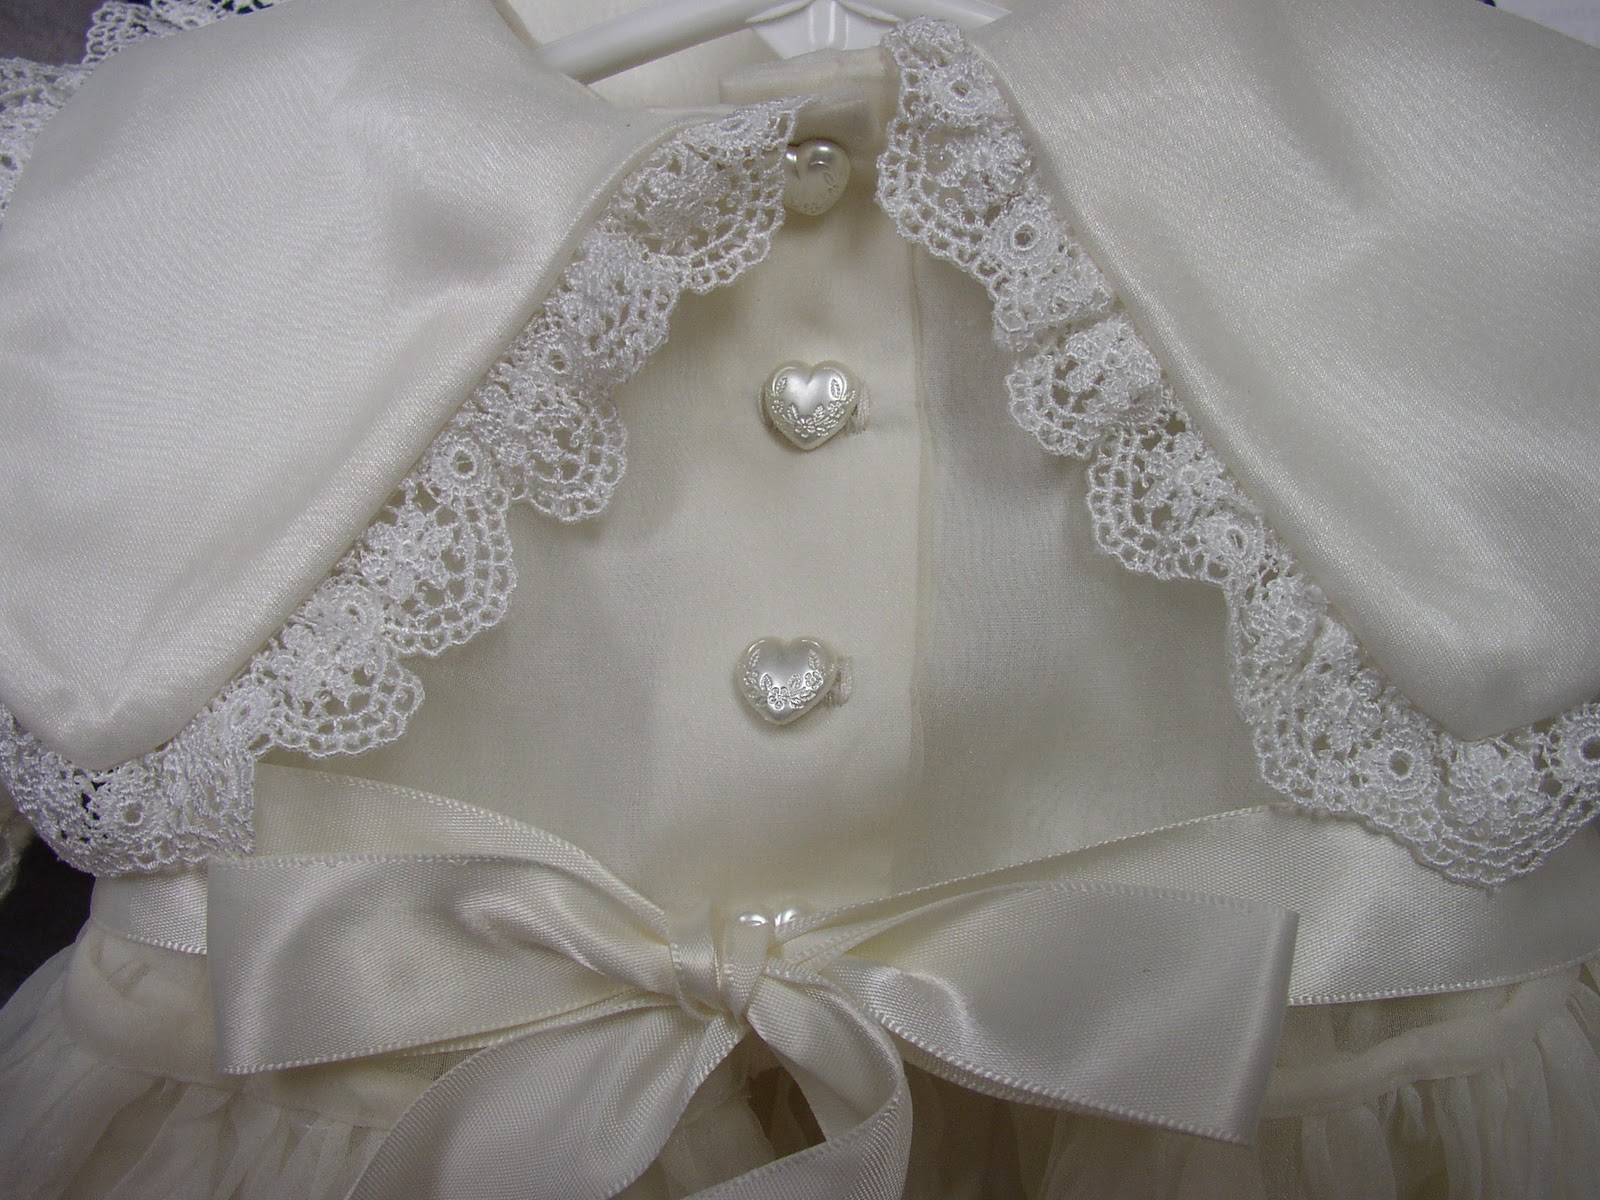
On the back, I used the heart-shaped pearl buttons and plenty of satin ribbon for the bow.
The dress has french seams, meaning there are no exposed seams inside the dress. The underskirt has a crocheted lace border that I did for it.

Here is the bonnet:

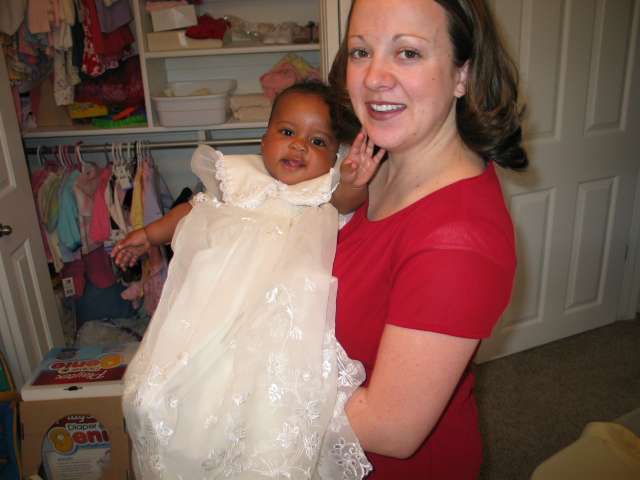
Here’s beautiful Miss Cuteness in her dress. Cuteness was almost 9 months old by the time my brother, Jon, was able to get her from the orphanage. Shari is eight months pregnant, which is conveniently disguised by the length of this dress. I know I could have made it shorter, but I loved the lace so much I just couldn’t bring myself to do it.
Two months later, Sweetness modeled the dress. I made matching shoes for this dress too. The one shoe has JS on the bottom for Jon and Shari. The other shoe has BP on it for their last names.


Sweetness is also laying on a blanket that I crocheted around the edges for her. You can see the french seams in this shot.
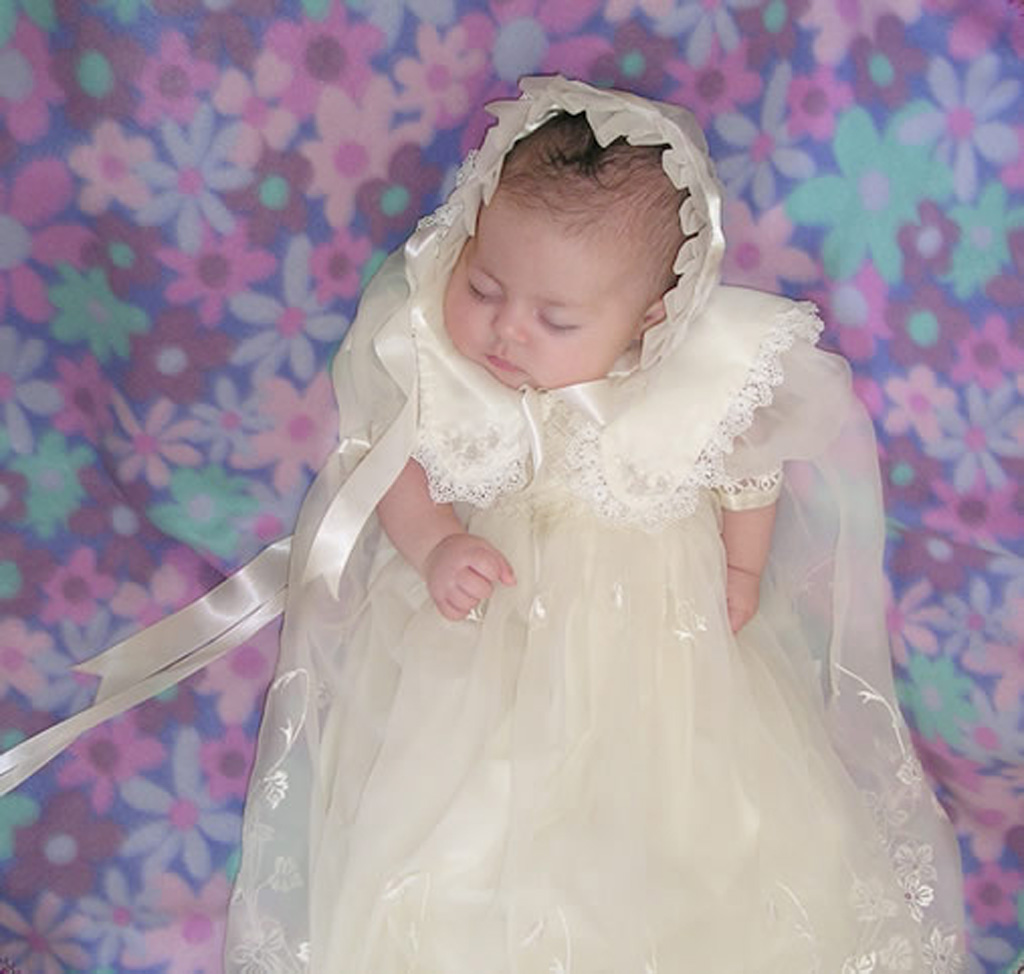
Isn’t she an angel?
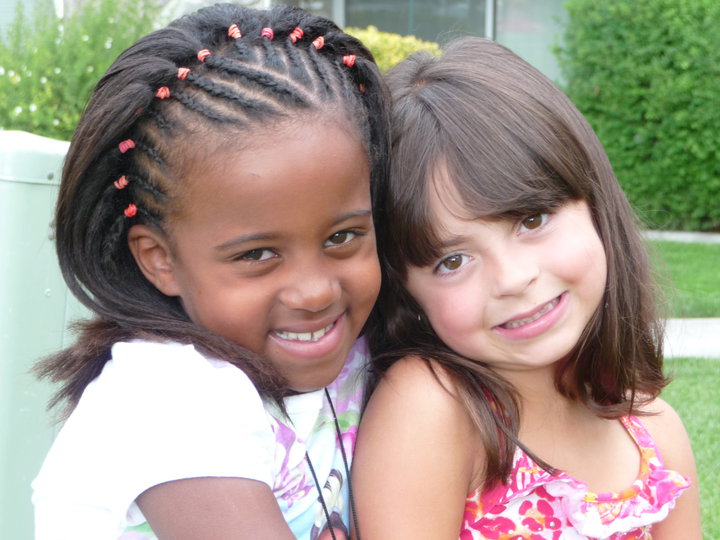
Both girls are an utter delight to me. It broke my heart when I moved back to Ohio and could no longer play with them. Here is a picture of the girls today, the very picture of both Cuteness and Sweetness.
Cost Breakdown:
Vintage Wedding Gown – $12.00
Pleating – $10.00
Thread, embroidery floss, cotton fabric and ribbon – @$10.00
Total Project Cost: @$32.00
Total Time: I couldn’t even begin to guess.

I’m linking this post to the parties on my Link Parties Page!
I’m also linking to GetYour Craft On. (they made me say this 🙂)