Kitchen Renovation – Starting Point
Before I begin, let me just state for the record that all I really wanted to do was remove the wallpaper and the carpet. That was it. My two goals for my kitchen when I moved into the house.
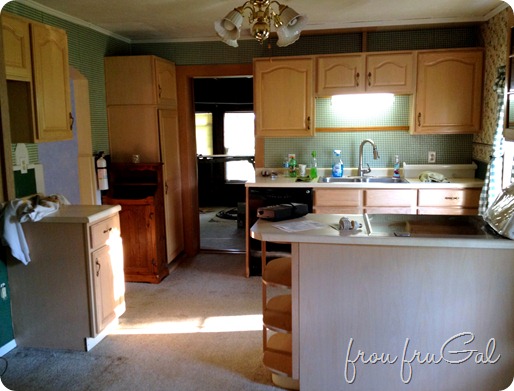
Notice the 1980s Berber carpet? I imagine this looked good for 1 week. Seriously, it should be against the law to have carpet in the kitchen. Sadly, this is not the first house I have moved in to with kitchen carpet. *Heebee-Jeebee Shudder*
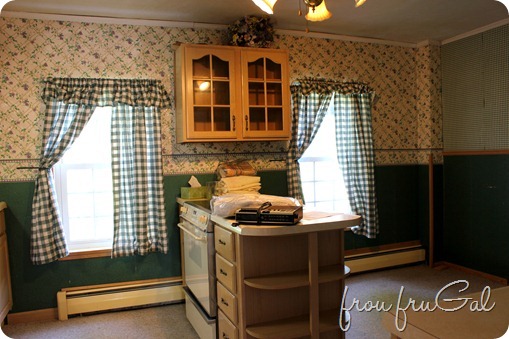
I am not a hater of wallpaper. But this wallpaper was not my style and it had seen better days. Plus, look how short the windows look. Also, while I loved the idea of having a glass cabinet on that wall, that lasted until the first time I tried to use it. It was impossible for me to reach and use. Pretty, but totally useless.
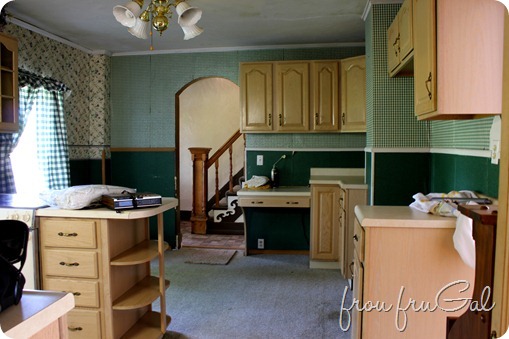
The chimney running up through the wall on the right makes for an interesting design challenge. There’s something I want you to notice. See how far back that short cupboard is for over the fridge? Now look at the stain on the carpet (just to the left of the “frou”). That’s where the edge of most refrigerators go. I am neither Elastigirl nor Go-Go-Gadget’s daughter, making this another useless cupboard!
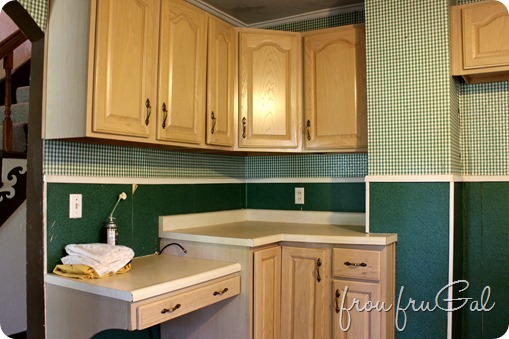
That little space to the right of the base cupboard in front of the chimney is a perfect spot for our water cooler. We have well water with a very heavy iron content. I use my water cooler a LOT!
For some reason, repeating patterns in the kitchen make me claustrophobic. I really, Really, REALLY dislike them. I started pulling down the wallpaper before we even moved in.
Naturally, I assumed I would have to paint once I removed the wallpaper, but the thing I had forgotten when I set out to achieve my two kitchen goals was the very first law of DIY.
DIY LAW #1: ALWAYS EXPECT PROBLEMS. ALWAYS.
How could I have forgotten that rule? It’s not like I’m a property virgin. I’ve made a life of moving into houses. In 25 year of marriage, this is our 21st house. TWENTY-ONE!!! I can’t even explain how I could have forgotten the most basic rule of DIYdome. Inconceivable (I don’t think that word means what he think it means).
Problem #1 – The Carpet
Why would this be such a problem you ask? Allow me to illustrate.
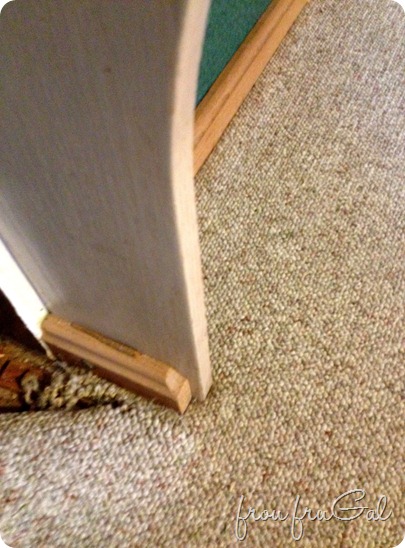
When I went to pull the carpet out, I realized the carpet was installed first and then the cabinets. In order to remove all the carpet, we had to pull off all the countertops and the cabinet bases.
Plenty of people suggested we just cut the carpet out around the cabinets. That sounds good in theory. In reality, it didn’t work. The only shot of this I have is one our cat, Adam Levine, photo bombed. If you look at the cabinet base in the upper right, you can see what I mean. Hello, raggedy edged carpet. Cutting it out did not work.

I took the carpet out in stages, and I had cut around it in this stage until I was ready to pull out the cabinets. I was not actually trying to take a shortcut. Both Hubs and I are big believers in doing things the right way. We have had to fix too many problems when people before us tried to take a shortcut on a project. Doing things the right way the first time saves you from a lot of problems down the road.
As Adam Levine also illustrates, the original floors were a mess. Over the past 162 years, they have taken a beating, which if that had been the only problem, I would have gladly refinished them. However, there are sections that are patched and there are large gaps in places that allows cold air from the basement to come up.
Problem #2 – The Walls
When I started peeling off the wallpaper, the dark green came off very easily as it had paneling underneath it. Between several layers of paint and wallpaper glue, plus, three layers of wallpaper, it literally peeled right off. I never had to break out a scraper for it. The top section was a little harder as it had textured walls underneath the multiple layers of wallpaper, but it also came off pretty easily.
Until I got to the window wall and the sink wall. Remember the first rule of DIY? Yep. It is so, so true. Always expect problems.
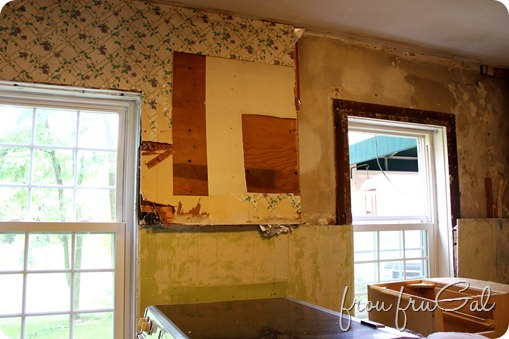
The paneling was attached to this wall with furring strips. Really thick furring strips. I’m not sure why they felt it necessary to build out the wall so far. The main wall is plaster over brick, so maybe they thought that was the only solution. Instead of leaving the plaster above the paneling, they attached a smooth sheet of plywood and wallpapered over that.
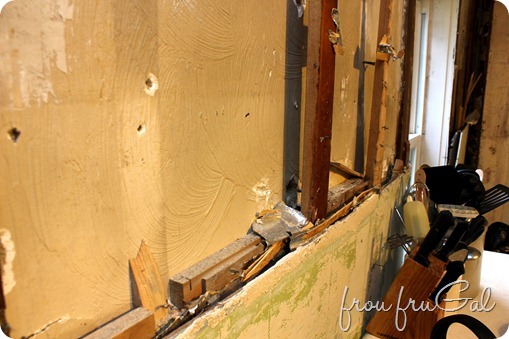
You can see how far out this moved the wall. It’s a good inch or more from the plaster wall. They ended up paneling right over the window casing. When we pulled it down we found all sort of nasty mold and fun stuff.
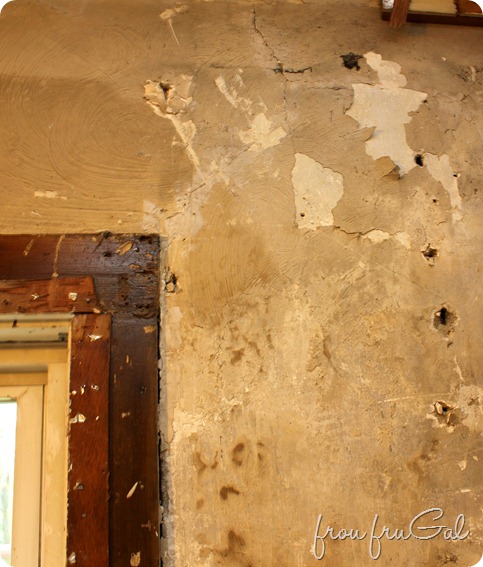
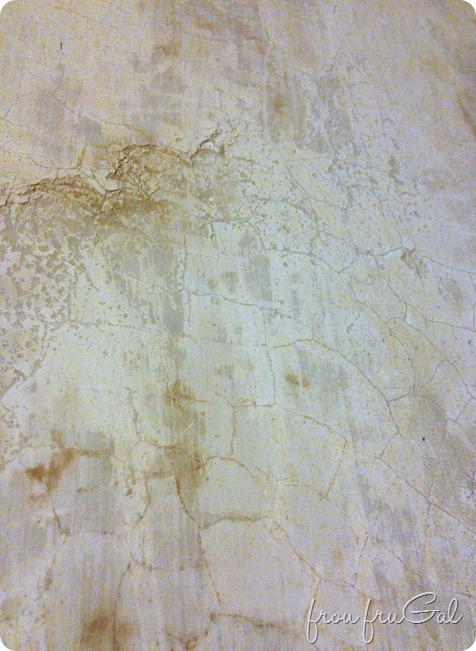
When I cleaned it with bleach, it removed the texture and took it down to a smooth concrete-type finish. I will remove all the plaster texture down to this layer and then patch the holes. I absolutely love the subtle texture of the wall. Assuming I can make some smooth patches, I will definitely play up this texture in the final wall treatment.
We also found termite damage in one of the window frames from some long-ago termites.
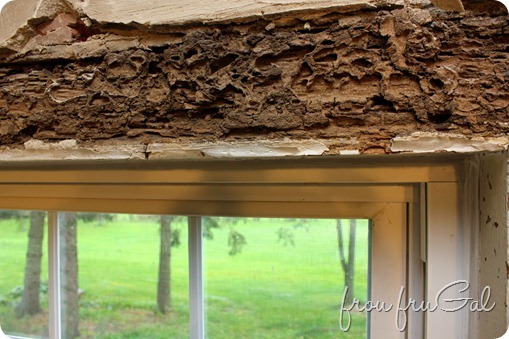
We have a lot of work to fix the window casings and replacing the damaged lintel.
You can imagine in a 163-year-old house, the kitchen will have gone through some design changes. It’s like peeling an onion to go through the varying layers of wallpaper.
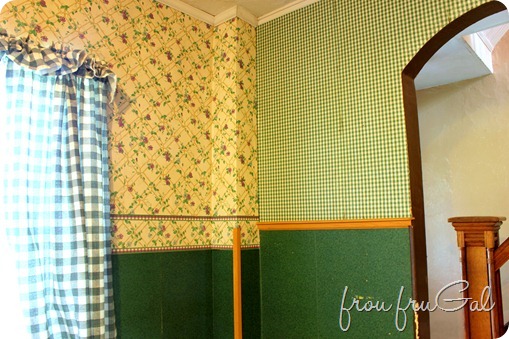
Before the celebration of the grape, we have the country wallpaper.

I believe this pink nightmare must have come from the 70s, as I seem to remember a love of old-timey country items from that time period. But I was a kid then. I could be wrong.
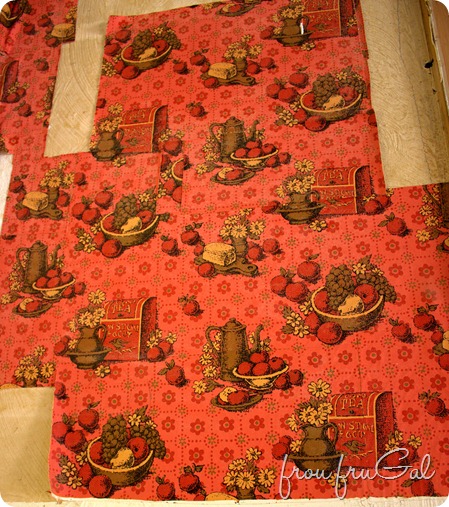
Perhaps during this wallpaper’s reign is when they had the red barn wood on the window wall. My neighbor tells me her husband had done that when they were living in the house.
This paper is actually quite lovely and I wouldn’t mind having this in my kitchen. I believe it is from the 50s, but, again, this is just a guess.
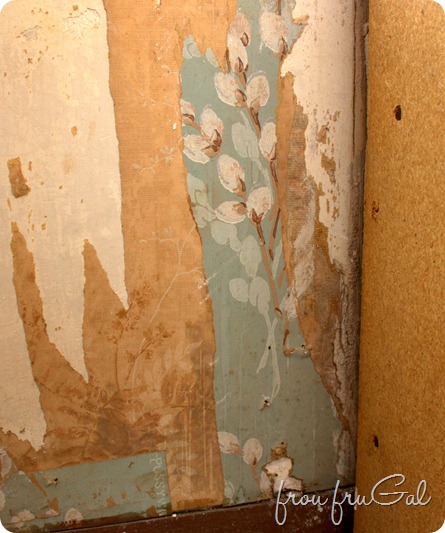
I suspect this wallpaper was used while the walls were painted this color.
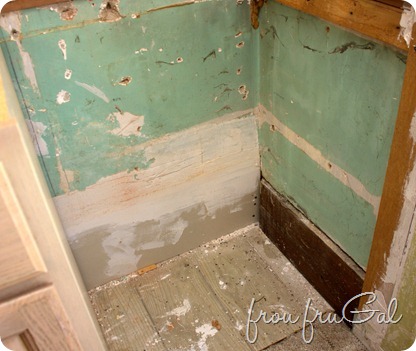
Then we have proof of varying paint colors, as seen by the paneling. Apple green, country blue, red and peach all took the spotlight at one time in the kitchen.
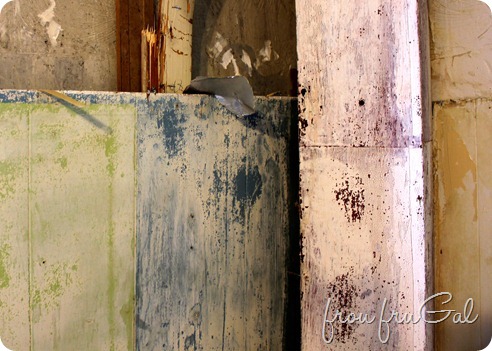
Let’s not forget the yellow, either. This ol’ kitchen has been around the paint wheel a time or two.
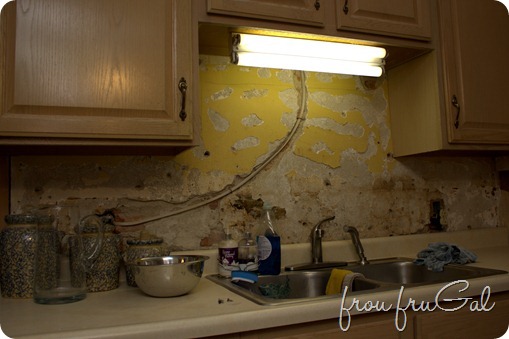
I did not do the demo in the kitchen all at once. I did things in stages as I had the time and energy to work on it over the course of a couple of months. We have to live in the house and with me doing hard time in car prison for the past 6 months, (aka – driving kids to school for 1.5 hours a day) I did not have a lot of time to devote to a full kitchen gut and redo. Plus, with a special needs person in our family, we have to consider how much upheaval to introduce into our life.
The whole time I was going through the demo process, I kept telling myself I was just trying to do the project as cheaply as possible. To have a “good enough” kitchen instead of a dream kitchen. Dream kitchens cost big money and I didn’t see us being able to afford it and I thought a dream kitchen would require everything brand new.
As we went along, though, it became obvious that I was going to have to invest some money into the kitchen. When we pulled out the carpet and the paneling and exposed more wall space, suddenly our counters no longer fit.
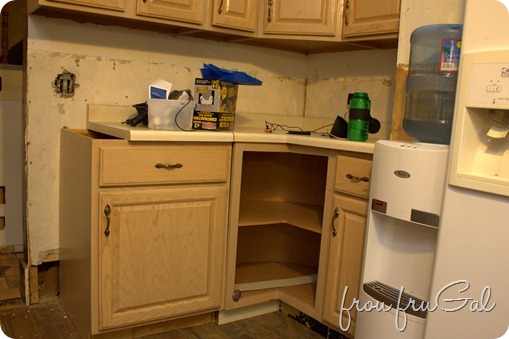
If we are going to have to replace the counters, I started thinking about what kind of countertop I really wanted.
We also realized the flooring could not be salvaged and we would need to put in something new. What kind of flooring did I want in my kitchen? Then, as long as the cabinets were out, we started to rethink the layout and things just continued to snowball.
I am still committed to doing this kitchen renovation as cheaply as possible. I have taken the time to move things around and work with them to see how I like them before making final decisions. I’ve tried to assess what we have that can be salvaged and am trying to limit what we need to buy. My goal is to redo the kitchen for $1,500 or less. I haven’t made my final decision on countertops and flooring, so I’m not entirely sure if I can meet that budget. But it is definitely my goal.
Up next, I will show you how we re-configured the layout and what my plans are for the kitchen. I’m dreaming big. There will be some new things, some old things, some reused and some repurposed things. I’m excited to work on this.
I’ve been sprung from car prison since my son got his license a couple of weeks ago. Woo-to-the-Freakin’-Hoo! In 21 days I will take my sister-in-law to Utah for her annual visit. She lives in Utah for four months of the year which gives me some time to crank through this project, plus several others I want to do while she is away. I think I can do it. My energy is perking up and I’m excited to see the kitchen unfold. Here are some sneak peaks at what I’ve done so far.
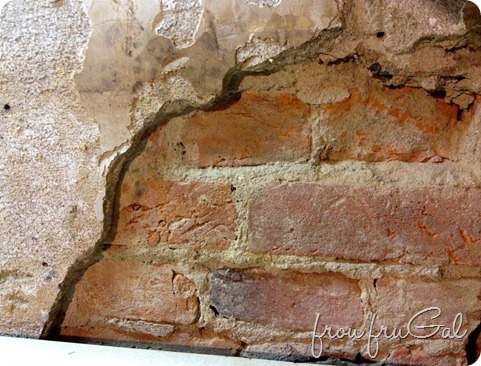
Exposing the brick wall.
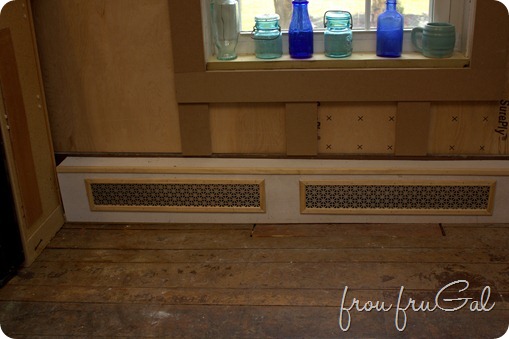
New heater cover.
Making the best of an old fridge.
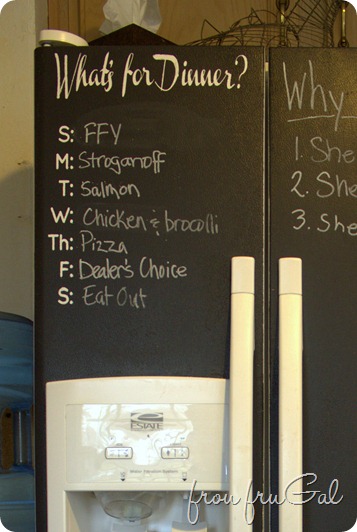
By the way, don’t judge me by my menu. Hubs and I are going out of town to celebrate our 25th anniversary and Man Child is coming up to stay here with Katie and the boys. I tried to make things easy for him, since I can’t see any of them cooking while I’m gone.
Has anyone else ever forgotten the first rule or DIY or is that just me?
